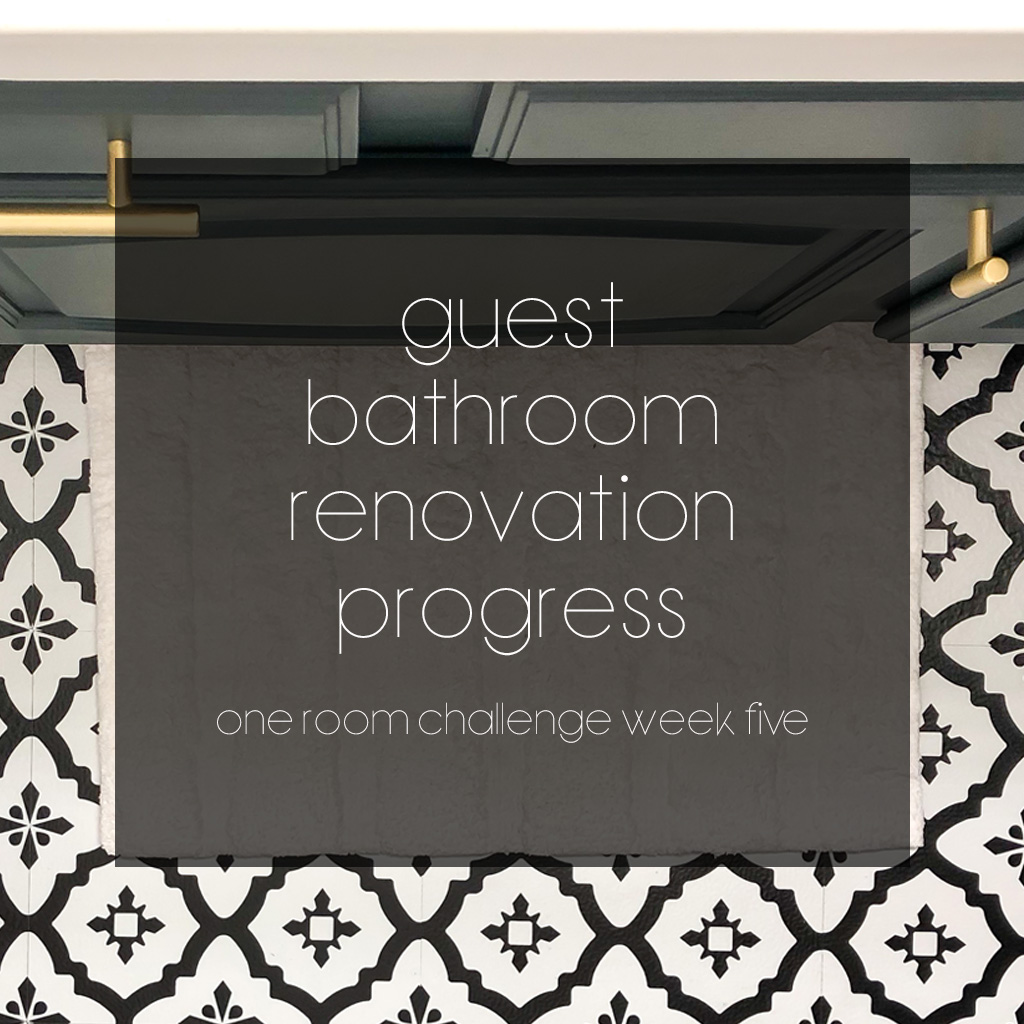
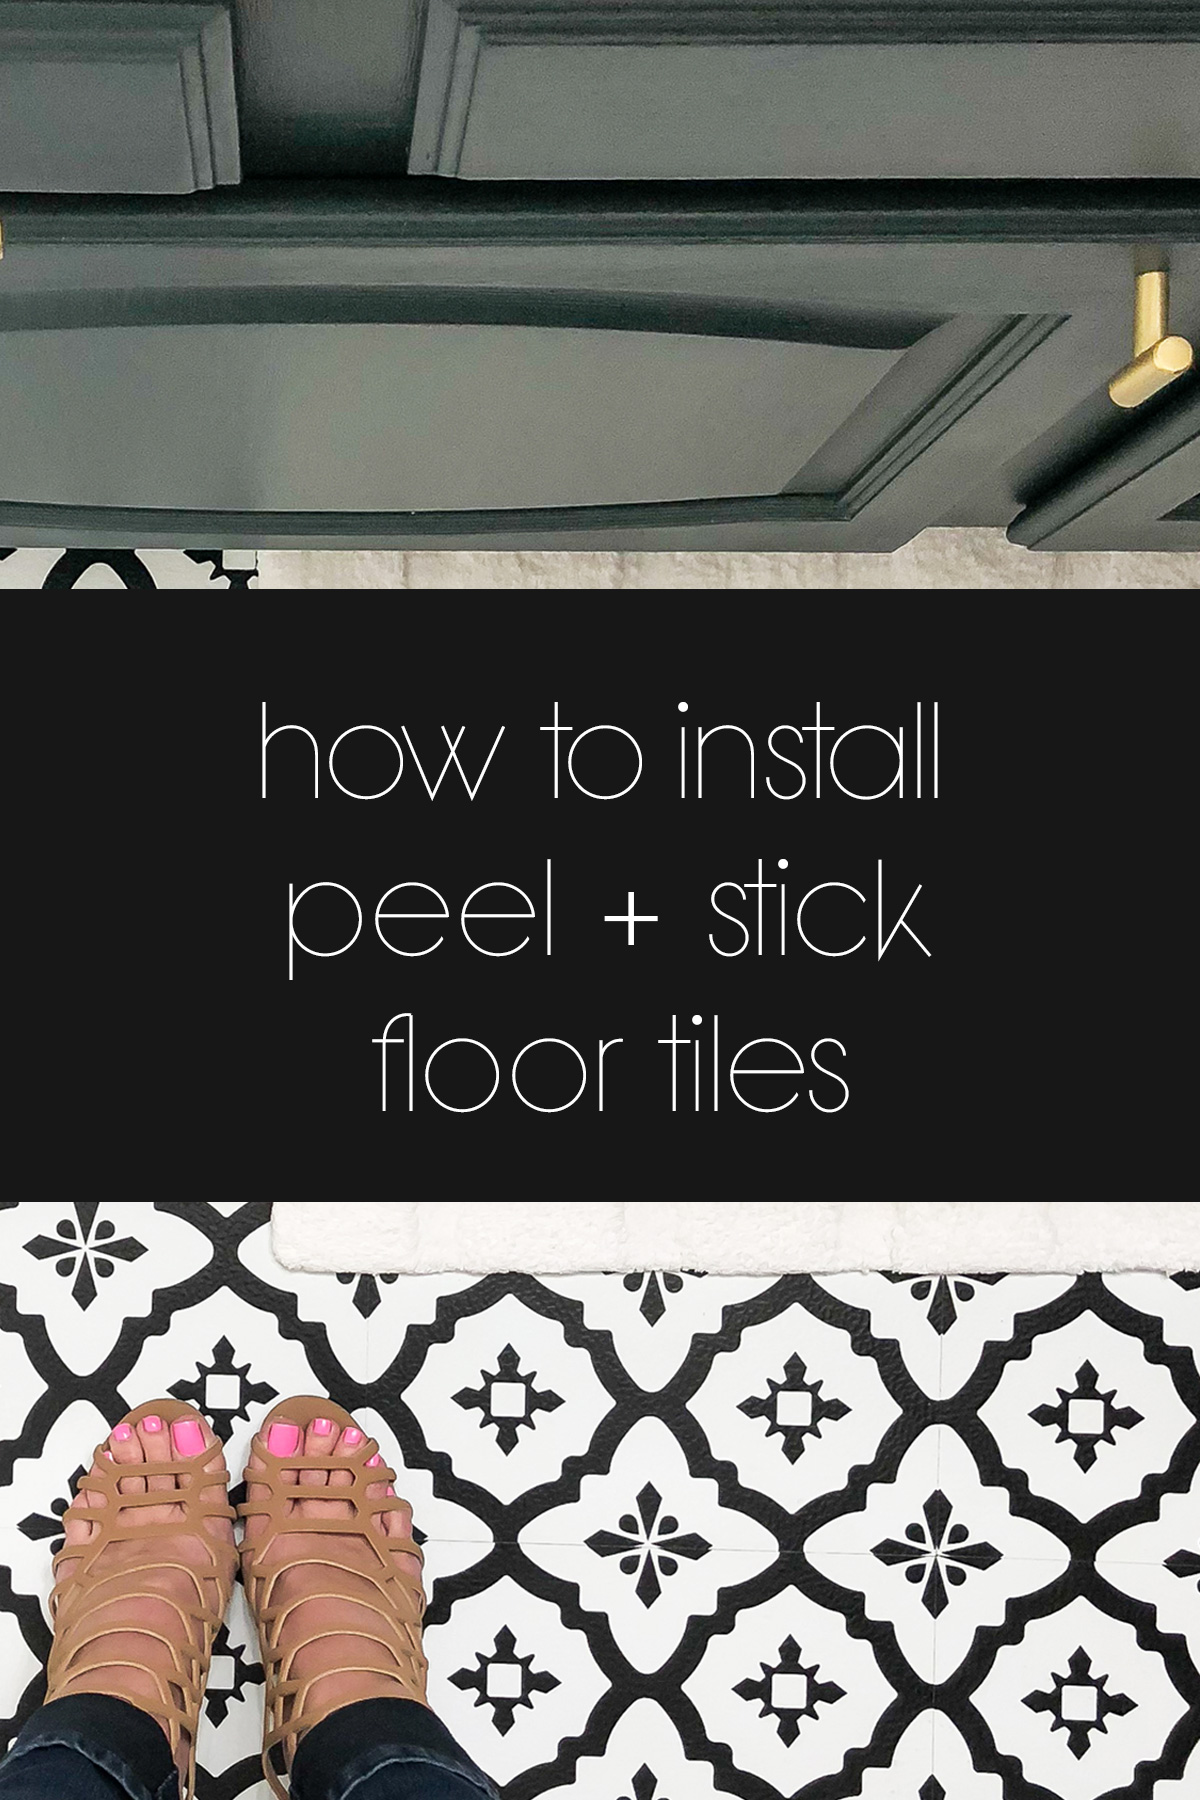
Only one more week till the full reveal of my guest bathroom renovation! If you’re new to the One Room Challenge, it’s where 20 featured designers and hundreds of guest participants root each other on to transform a room in 6 weeks.
Last week was all about decorating details from Overstock, and this week is the last piece to the puzzle – FLOORING from WallPops!

[This post contains affiliate links and is sponsored in part by WallPops, but all statements and opinions are 100% my own.]
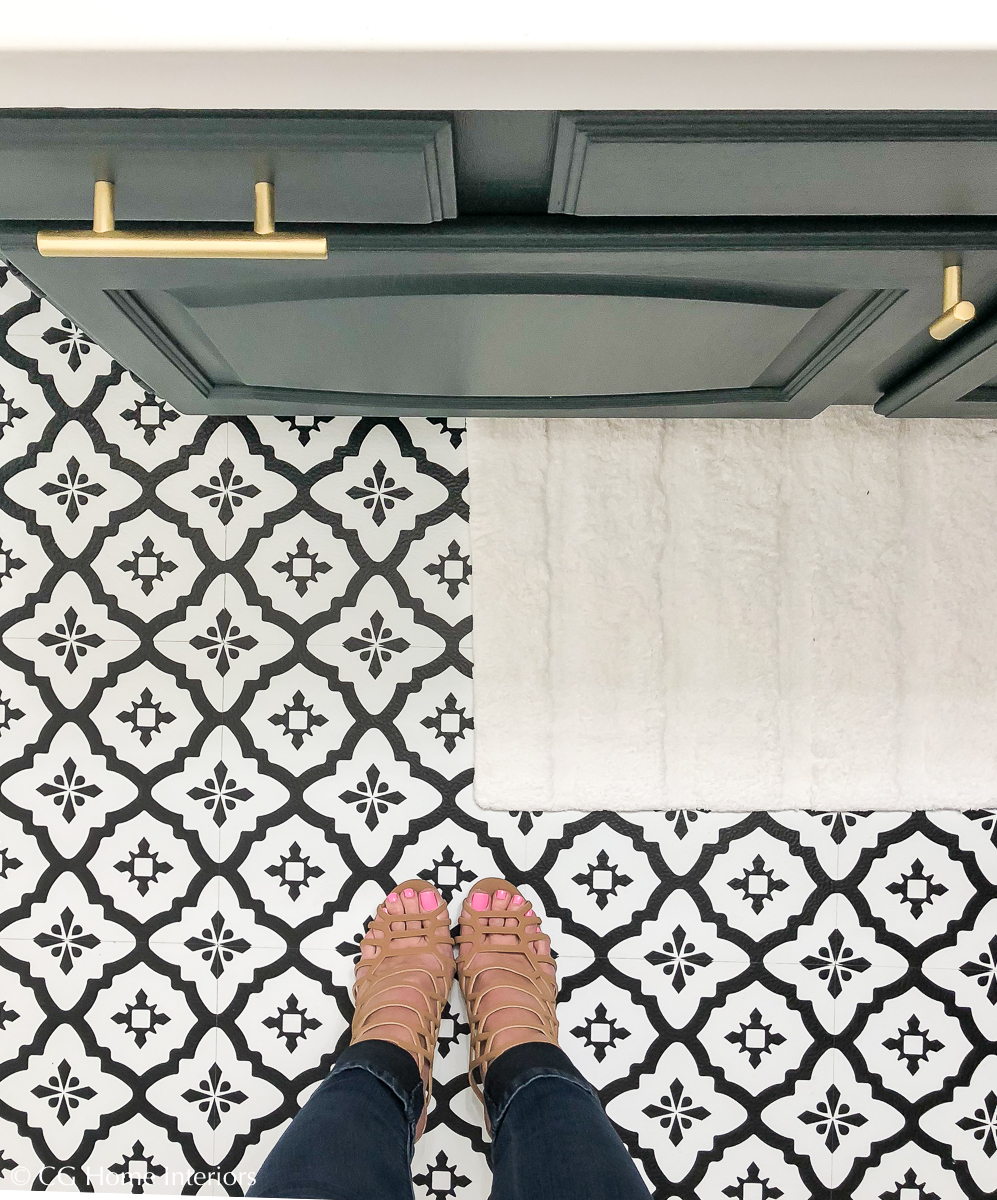
In Week 3 I mentioned a change of heart with the flooring, and was uncertain as to whether or not it would work. Well, it did (HALLELUJAH) and it was incredibly easy to install - minus the fact that my back locked up half way through and I’m still nursing it back to good.
Aside from that, it was a breeze to bang out in one afternoon so I’m sharing the process with you here today!
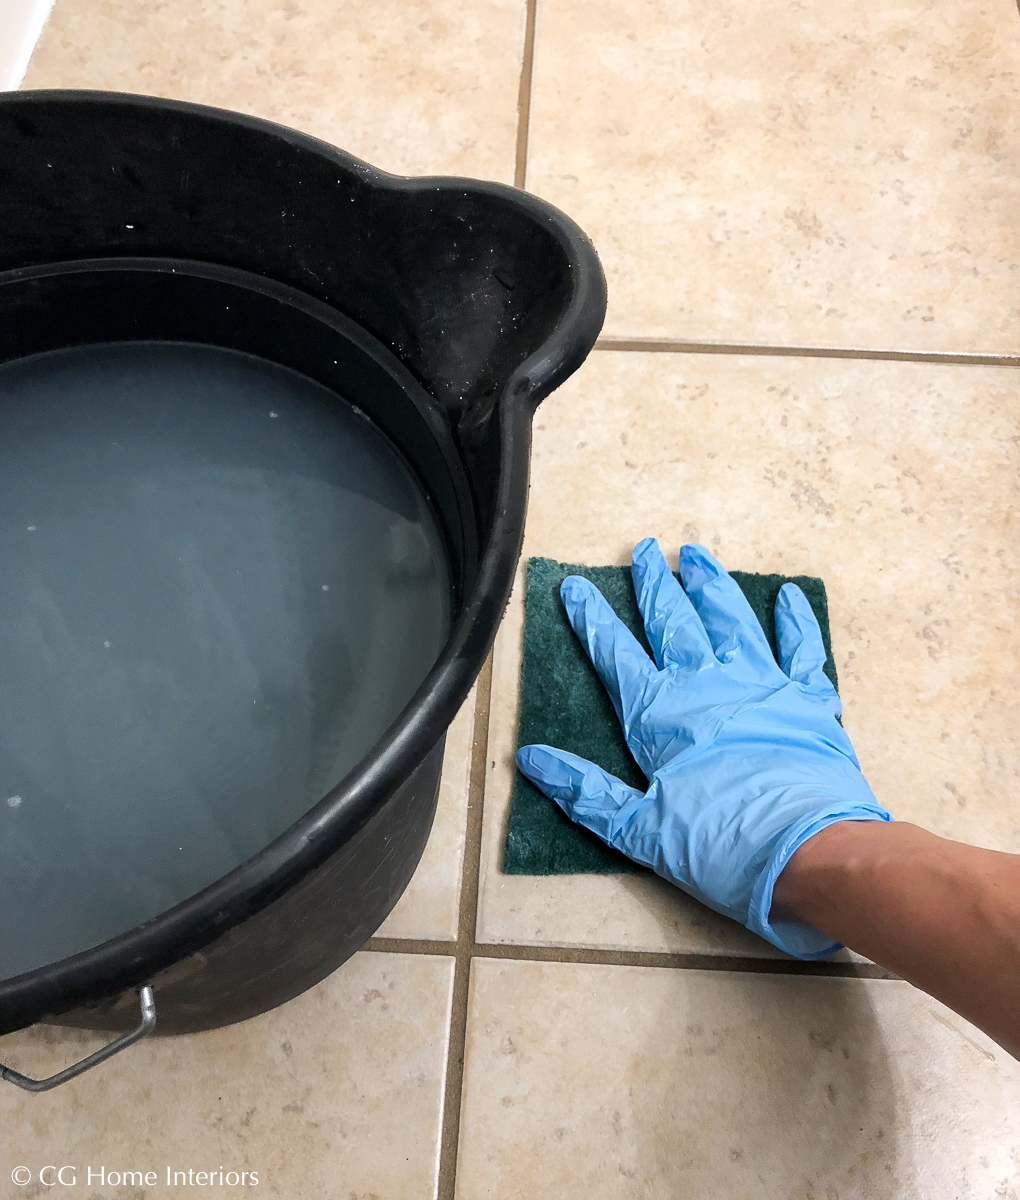
STEP 1: DEEP CLEAN
SUPPLIES
- Comet Peel and Stick Floor Tiles
- Gloves
- Scotch-Brite Pad
- Bucket
- TSP Powder
- Microfiber Cloth
Since I installed this over the existing ceramic tile, it needed to be spic and span – completely dirt and residue free (especially since my son leaves 9 lbs of hairspray overspray on the floor).
I dissolved 2 tbsp of TSP in 2 gallons of hot water and used a Scotch-Brite pad to scrub the floor in true Cinderella style.
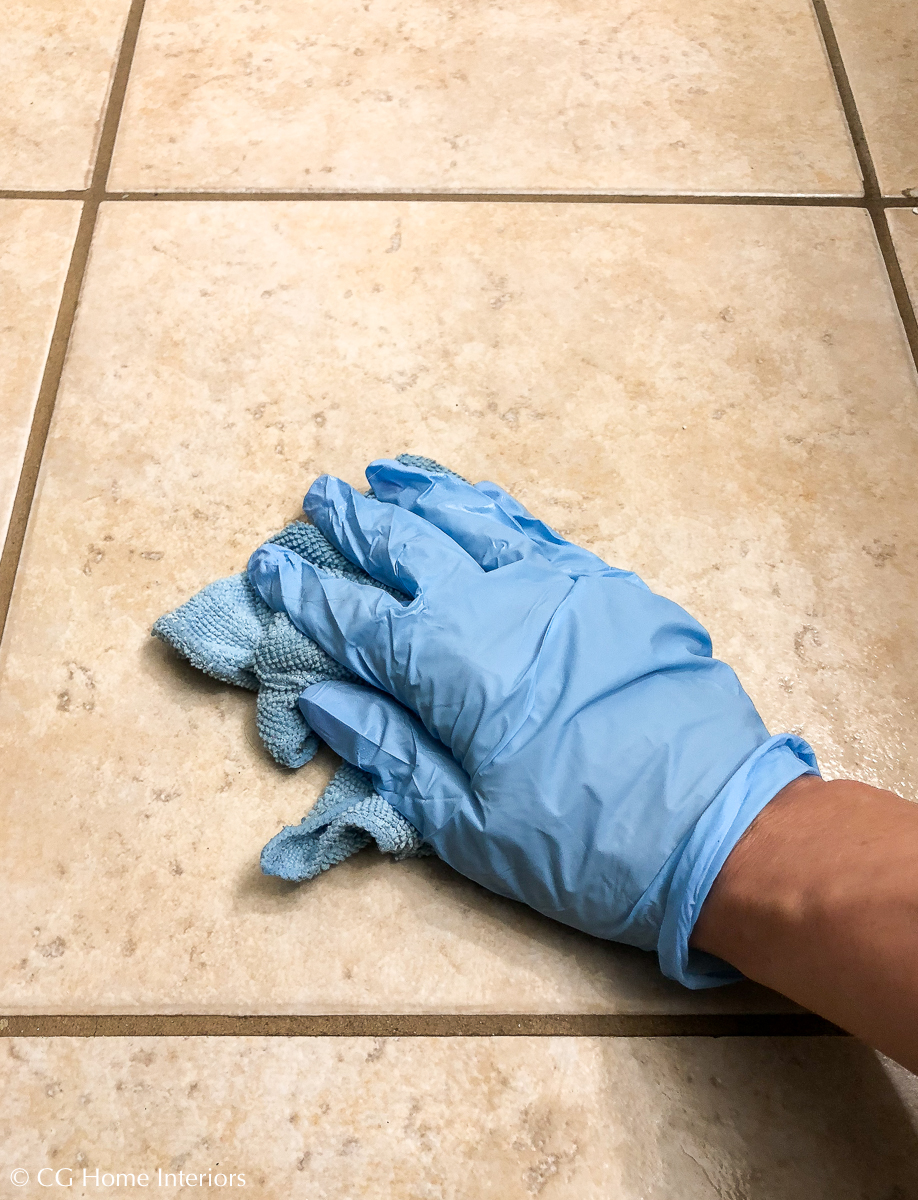
Next, I used the microfiber cloth to dry the floor and absorb any residue. I waited about 20 minutes more before moving to the next step just to ensure the floor was completely dry.
Don’t forget - I live in the dry desert where it’s 4 million degrees and things dry quickly, so if your climate is not as extreme then you may want to wait a little longer.
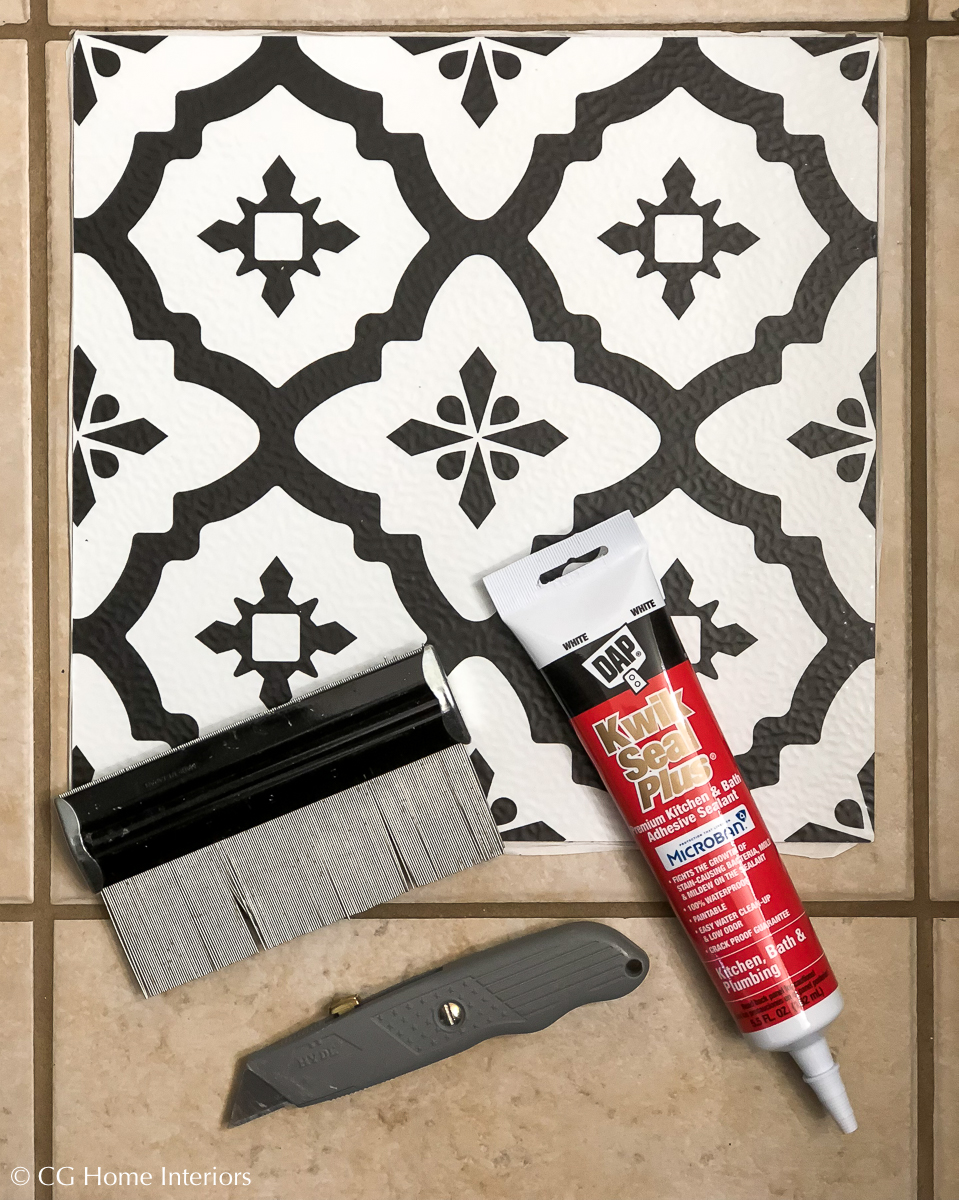
STEP 2: INSTALLATION
SUPPLIES
- Peel and Stick Vinyl Floor Tiles
- Utility Knife
- Contour Gage
- Kitchen and Bath Adhesive Sealant
Luckily I didn’t have to deal with a lot of strange angles or curves in this small bathroom – or I may have ended up painting the floor. But, there was one tough area by the door that the contour gage really helped template.
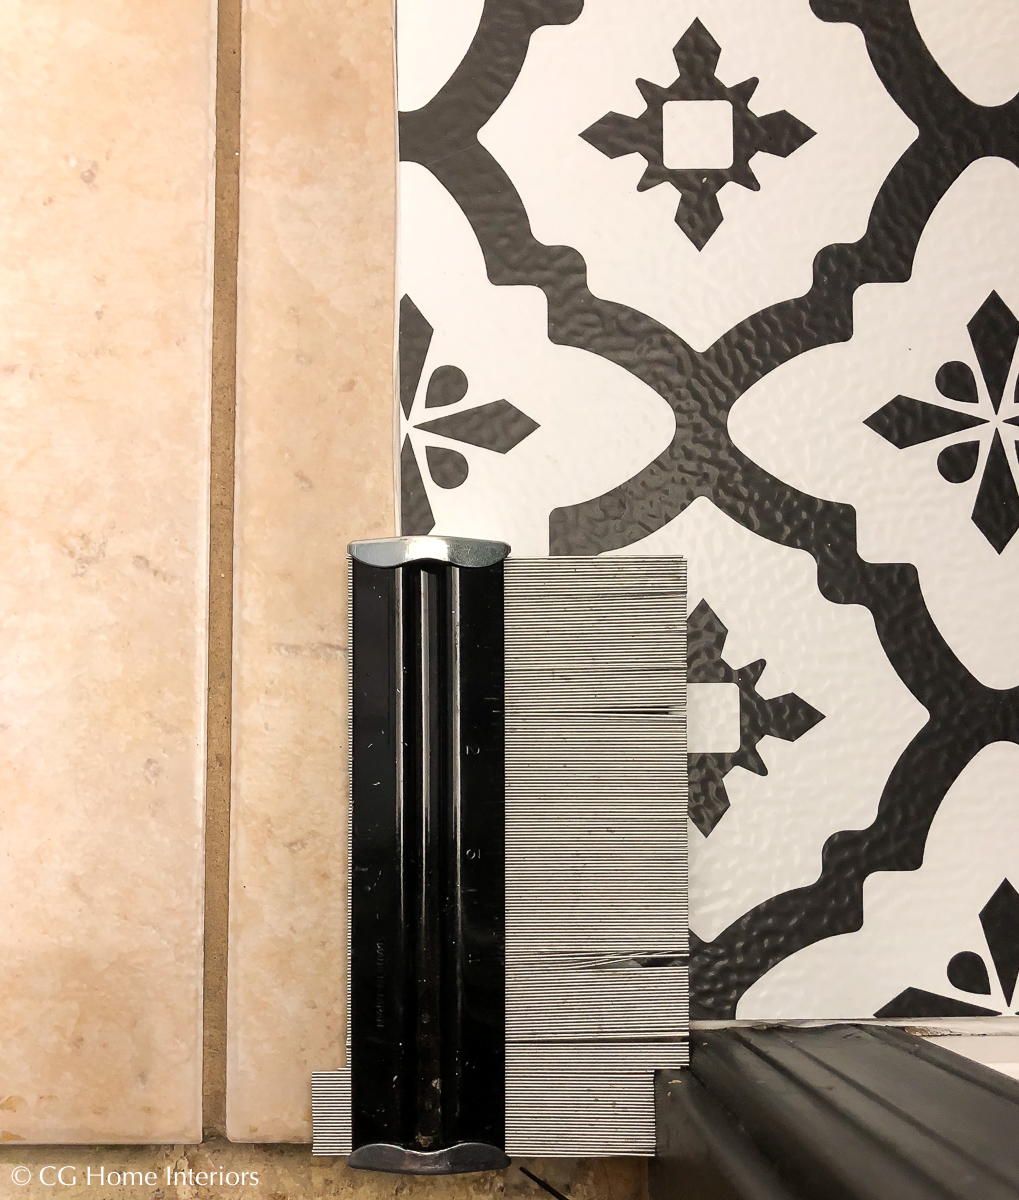
I made sure the edge of the gage was positioned where I needed the edge of the vinyl tile to be, and pushed it in until it met with the edge of the door trim.
Then I used a sharpie to trace the angles and draw a straight line across the tile where it needed to be cut to the other edge.
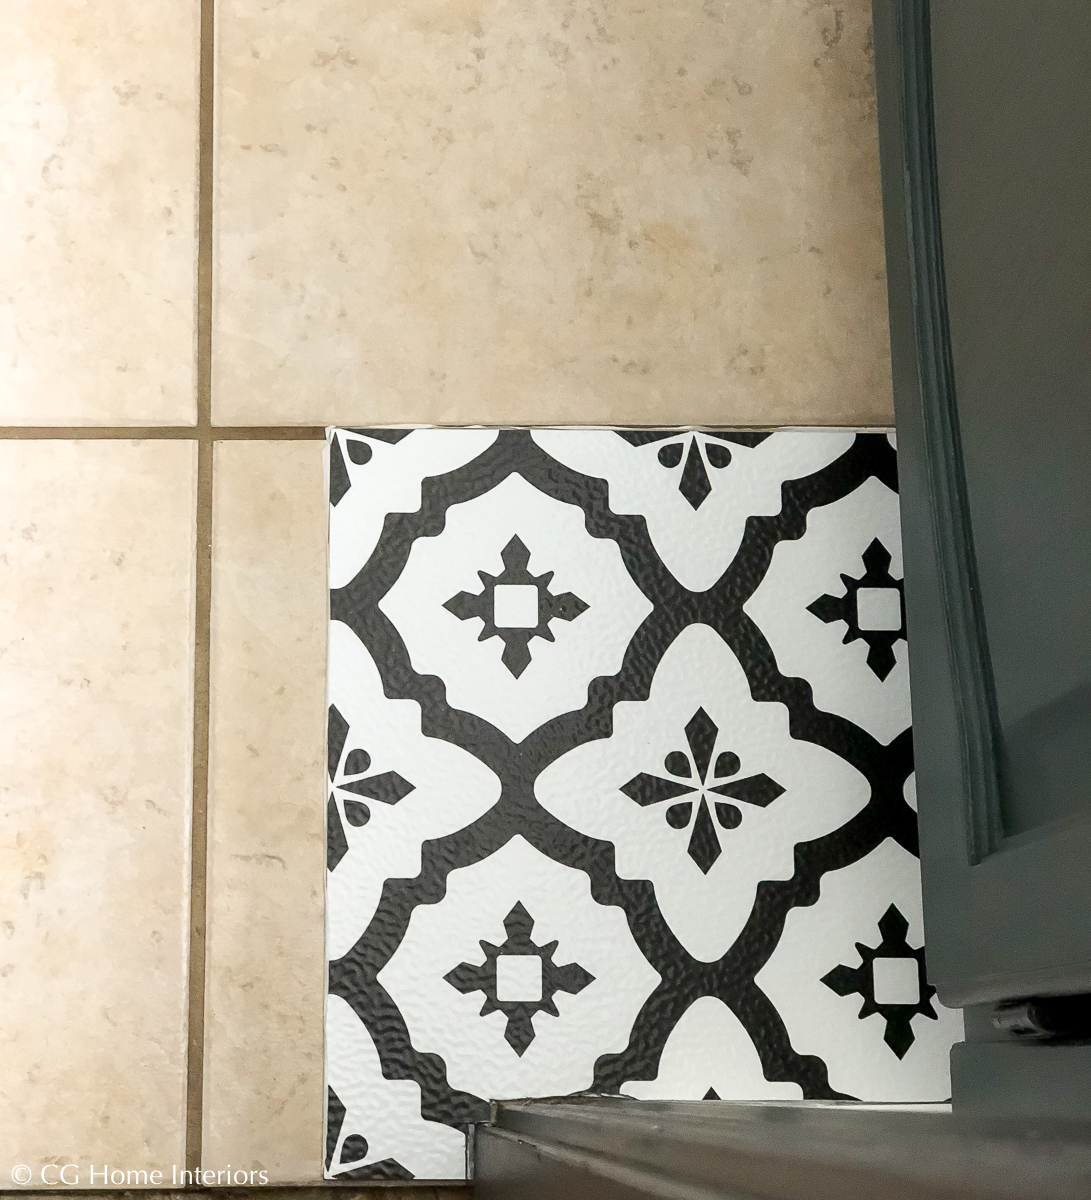
I used the utility knife to cut along the line I traced and test fit it with the protective backing still intact. I knew it didn’t need to be perfect - just as close as possible, because the sealant would fill in any gaps.
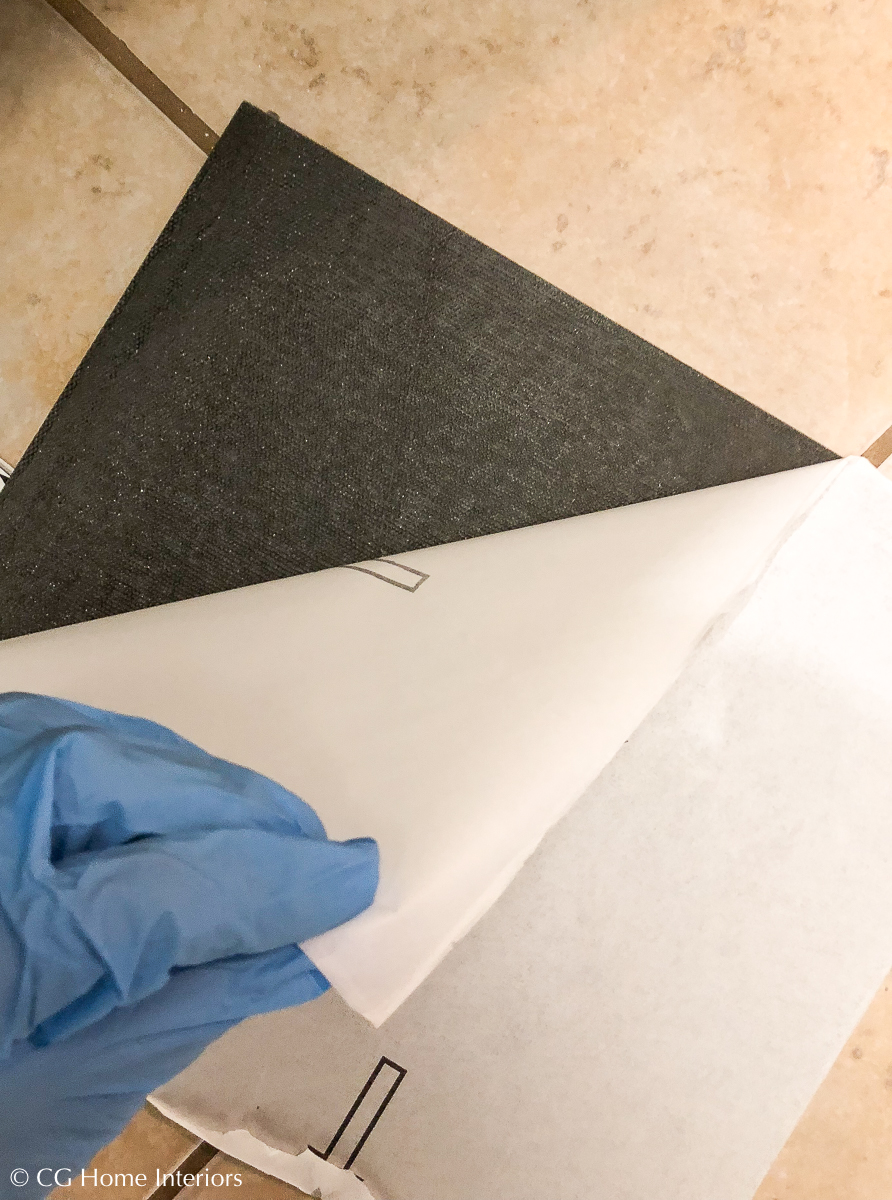
Once it test fit properly, I carefully removed the protective backing and positioned it into place. These are extremely sticky and you will not have a whole lot of wiggle room once it adheres to the surface, so I positioned the edge of the tile against the angles and side and pressed it down once those were lined up where I wanted them.
I repeat this step for each tile thereafter, going row by row and test fitting each one to make sure the pattern and edges lined up before adhering it to the surface. The pattern is slightly off in some areas which seemed to be a manufacturing issue, but the floor is so busy and it’s ever so slight that you don’t notice it unless you really study it. To be honest, it was less than $100 for all of the flooring in this small guest bathroom renovation so I can get past it.
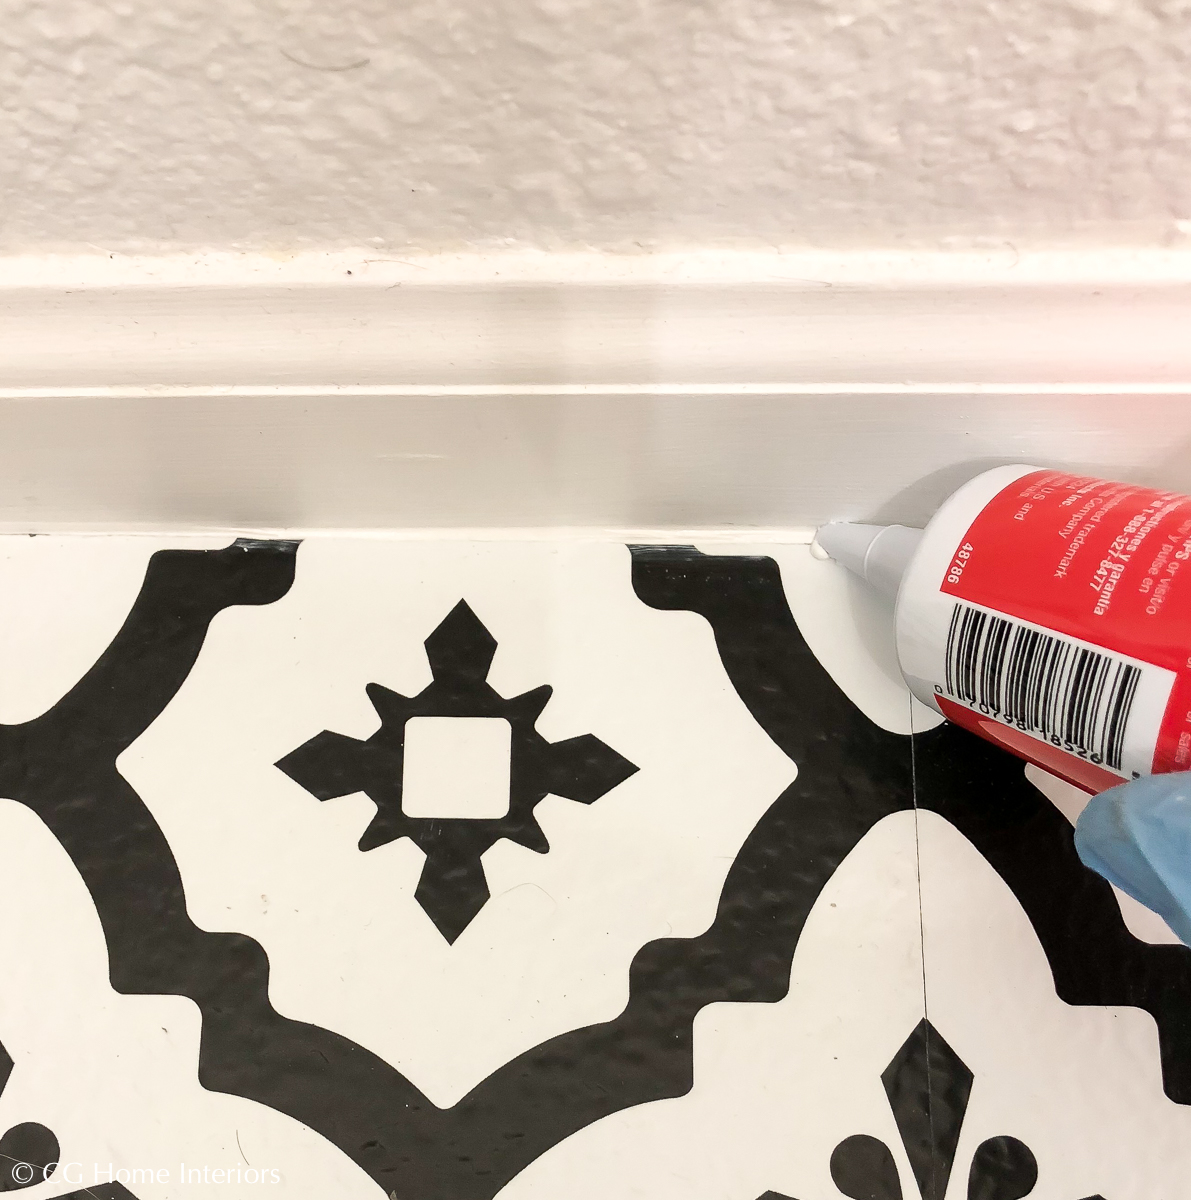
After all of the flooring was in place, I went around the perimeter of the room with the kitchen and bath sealant to fill in any gaps.
THE CONCLUSION
I think this is a really great cost effective product if you’re looking to redo flooring on a budget, or looking for a temporary solution until you can go all out. It was also MUCH quicker and easier than painting tile.
SOURCES
WallPops Vinyl Peel & Stick Tile / White Bath Mat / Cabinet Pulls
I can hardly wait to share my completed guest bathroom renovation with you all next Thursday!! These 5 weeks have flown by and I’m beyond ready to have the mess out of my hallway while enjoying a clean house.
Are you guys getting anxious to see all the amazing rooms the ORC participants have transformed next week??
I know I am!
XO,
Christina
P I N T H I S I M A G E
Comments
That floor is gorgeous! I
That floor is gorgeous! I never would have guessed it was an amazing budget DIY-what a great idea! I'm tackling my bath during ORC too, but had to leave our existing floors as is! :)
Thank you, Kristin!! It’s
Thank you, Kristin!! It’s definitely the best bang for your buck!
I LOVE this style of flooring
I LOVE this style of flooring! Never knew it existed in peel and stick!! -- are they actual tiles or decals that go over your existing tile??
Thank you, Brandy! It was new
Thank you, Brandy! It was new to me too! They’re actual 1/4” vinyl tiles!
Wow those floors look amazing
Wow those floors look amazing!!! Such a neat idea, you are so creative!! Love the way your bathroom is coming together!
Thank you so much, Bethany!
Thank you so much, Bethany! Love how your living room is coming together too!!
How does it hold up on foot
How does it hold up on foot traffic? Will it rip easily? Heels? U know what I mean?
Seems like it would hold up
Seems like it would hold up well, but I can’t tell you from experience because we don’t wear shoes in this area. Sorry!
Omg that pattern is to die
Omg that pattern is to die for!
It’s fun, right?! Thank you,
It’s fun, right?! Thank you, Jennifer!
That floor looks gorgeous!
That floor looks gorgeous!
I’d love to know how does it hold up with the amount of water and humidity we can find in a bathroom, is it resistant to washing it, mopping, etc? I’d like to know in advance because I might consider this DIY for my bathroom too.
Thank you, have a great day!
Hi Mitzi - yes, it is made to
Hi Mitzi - yes, it is made to withstand normal bathroom conditions and cleaning. It’s a typical vinyl tile - just with a more modern pattern. Hope this helps!
The peel and stick tile looks
The peel and stick tile looks great! And I actually think it looks better than the painted (due to the non-crispness the painting causes), but that’s just my opinion.
Thank you, Tana! I agree.
Thank you, Tana! I agree. There is a bit of texture but it is definitely crisper than stenciling. xox
This looks amazing!!! I can't
This looks amazing!!! I can't imagine the hard work you put it to make it this perfect.
Thank you, Mindy!! I’m so
Thank you, Mindy!! I’m so anxious to share!!
No way! That floor is
No way! That floor is amazing. I love it so much, so stunning! Our budget friendly babe!