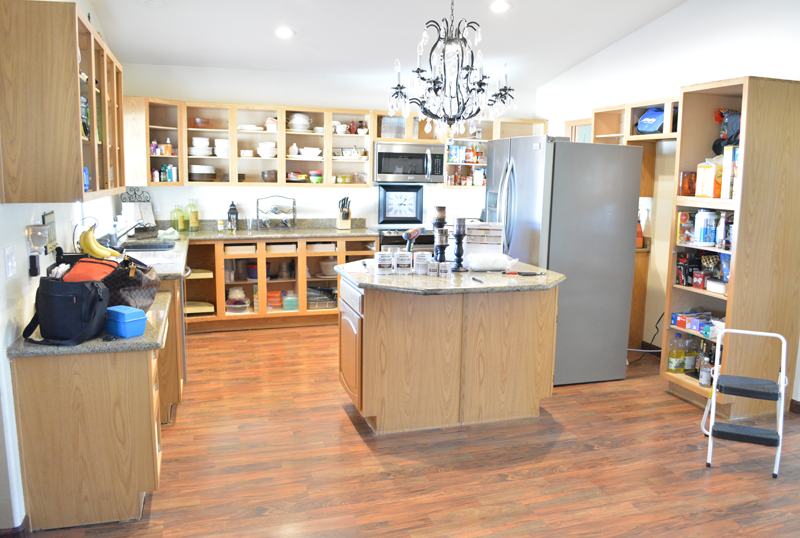
One of the things I immediately fell in love with when my husband and I first saw the house we live in now, was the kitchen. We looked at more houses than I’d like to count over a two year span and I can’t recall one kitchen where I thought, “I can entertain in here.” They were either really small, or barely had any cabinet space and storage, or needed some pretty major renovations to get it up to par. Not this one. It has the space and the storage.
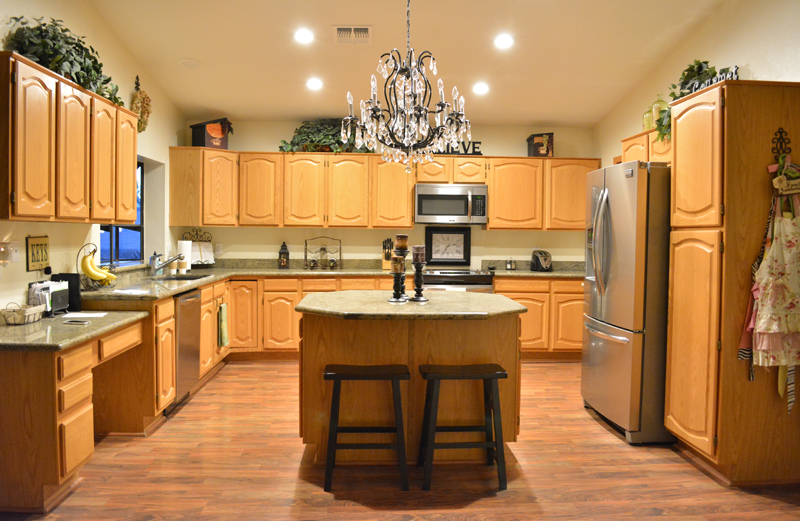
Our house was built in the early 90’s and there was a lot of oak. Oak cabinets, oak trim, oak doors, window sills, banisters, bookshelves. I mean A LOT. It took two years, but we finally got 99.9% of it painted and it completely transformed the house. The only oak left is the cabinets in the guest bath downstairs, but it works with the Saltillo tile. So until we change the floor, the original cabinets will stay.

(This post contains affiliate links at no cost to you)
MY VISION
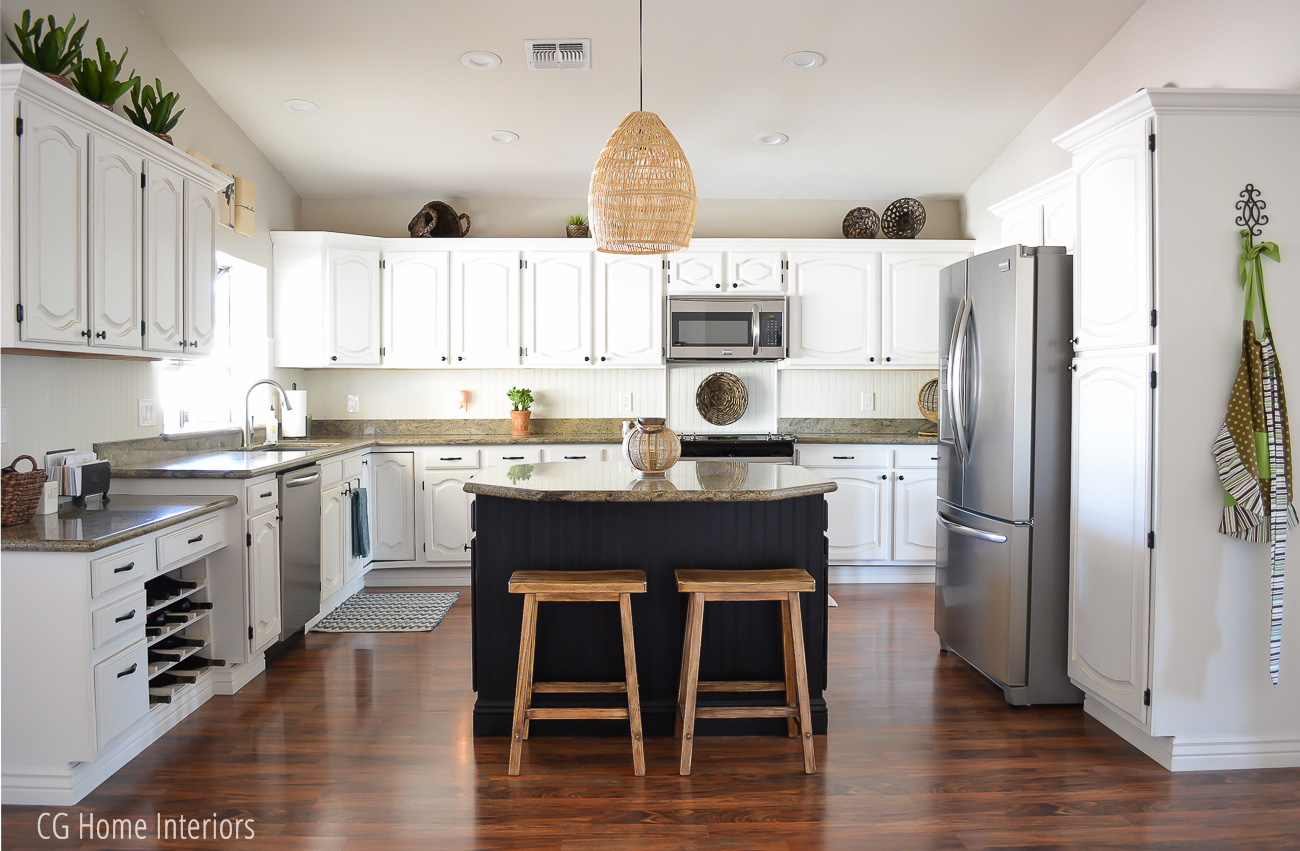
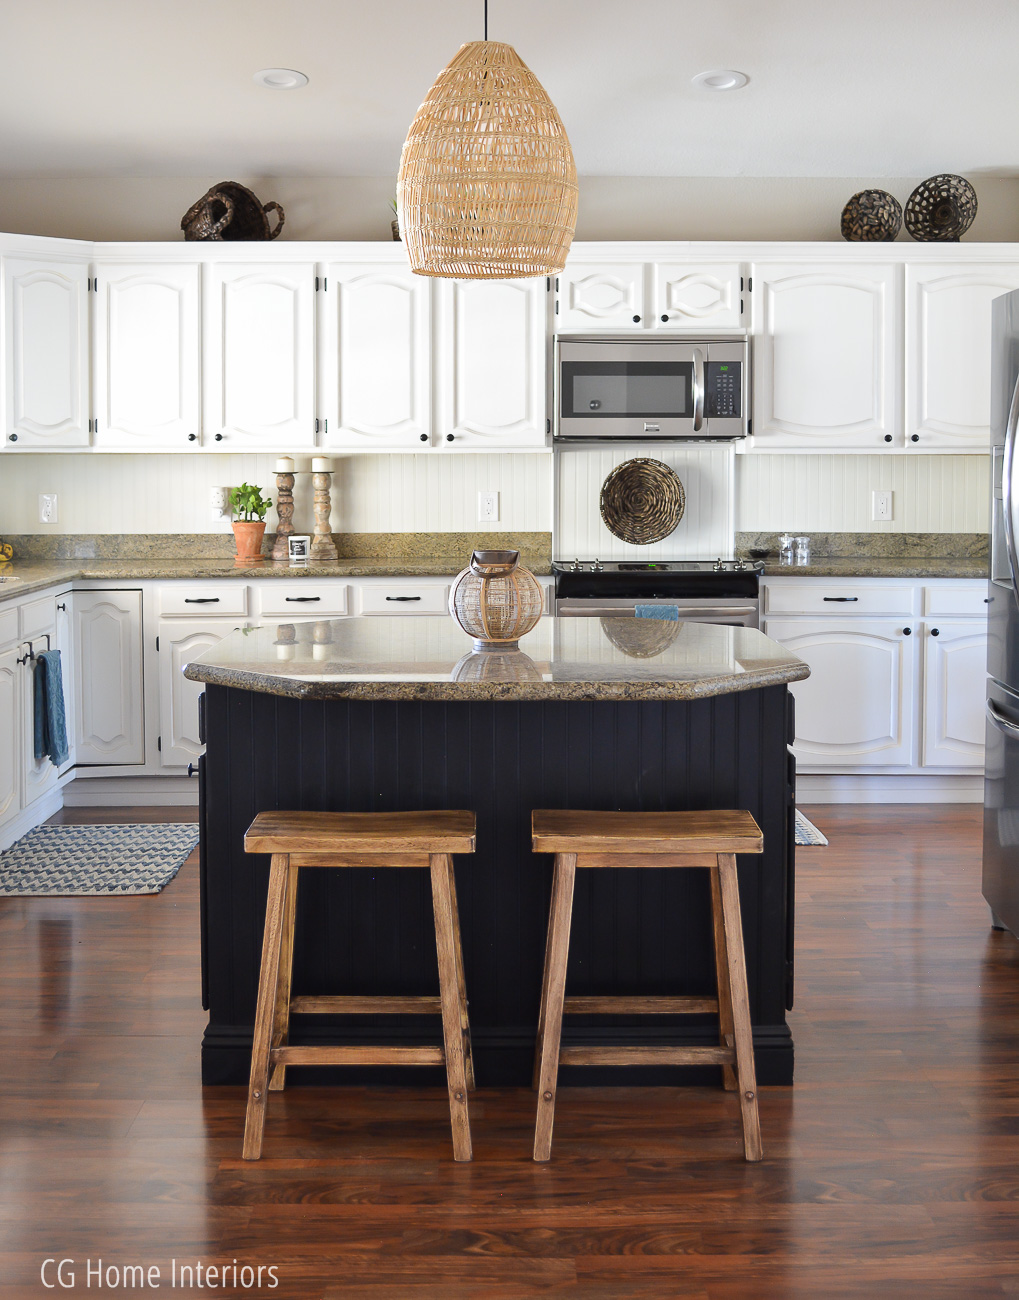
The look I envisioned was antiqued off white cabinets on the perimeter and an antiqued black island. When we did this project two years ago, it was my first painting project (other than walls) so I began researching paint and what would be most durable. That’s when I discovered Rustoleum’s Cabinet Transformation Kit that has everything you need to take your cabinets from start to finish WITHOUT any sanding or priming. I was highly intrigued. Each kit covers 100 square feet of cabinets (or 40 linear feet) and I found it at my local Home Depot. There are two kits to choose from – light tint base and dark tint base. I have 27 cabinets and 14 drawers that needed to be white, and 2 cabinets and 2 drawers that needed to be black so I purchased two of the light tint base kits and one of the dark tint base kits. I barely had to use any paint from the second light tint base kit, so if you have less cabinets to cover you should be able to get away with one kit.
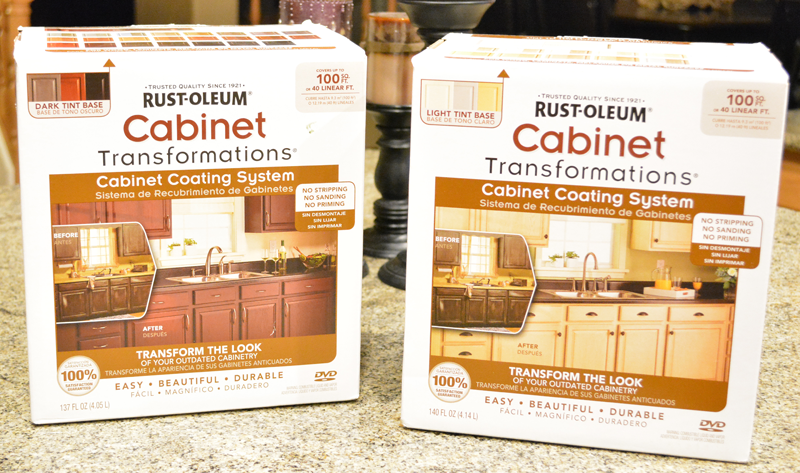
One thing I failed to read on the box is you have to have it tinted at the store. I didn’t realize that until I was ready to start painting and thought “how the heck is this going to create the color I want???” Then I looked all over the box and found this little blurb that said something along the lines of “tint must be done at the store”. DUH! I trekked over to Home Depot with all three boxes and went with the option called “Linen” for the perimeter and just plain old Black for the island. I was worried that the white was going to be a little brighter than I wanted, but I would also rather have it more on the white side than yellow so that option seemed safe. (The color photographs much brighter than it is in person. Especially after I antiqued the cabinets which actually brought down the brightness of the white quite a bit.)
THE PROCESS
We had a lot of cabinets to remove and paint. When we bought the house I had nothing against this kitchen and actually didn’t mind the oak, but I had been dreaming about an antiqued black and white kitchen for quite some time and this was my perfect opportunity. My style has evolved over the last two years, but the black and white has proven to be a classic base that works with whatever style changes I’ve made. I also loved the amount of cabinet space compared to all of the houses we looked at during our search. However, I didn’t love the amount of cabinets when we were doing this project – O.M.G.

The Rustoleum kit comes with very thorough and easy to follow instructions. The first thing it recommended was sketching a picture of your kitchen and numbering each cabinet and drawer, then putting that corresponding number on the actual cabinet and drawer face when you remove them. That’s something I wouldn’t have thought of and been totally screwed and frustrated trying to remember which cabinet goes where when it’s all done.
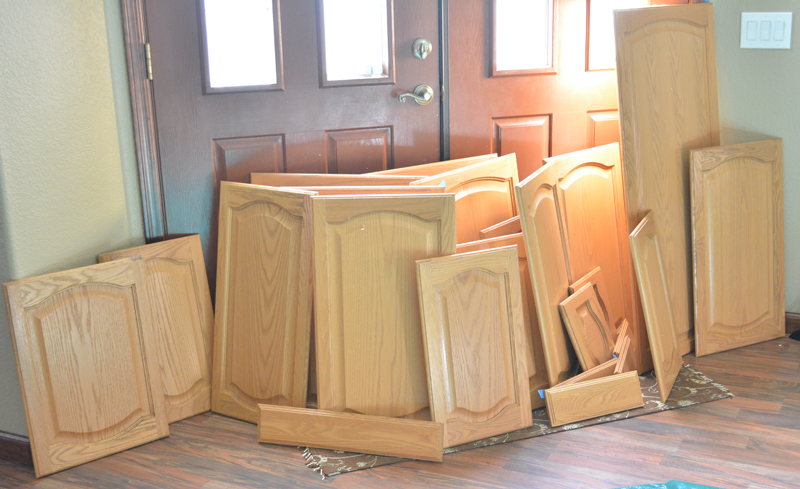
I would recommend the same method for the hinges if you don’t plan to purchase all new ones (we spray painted ours black). My husband labeled a brown paper lunch sack (we’re fancy) with the corresponding cabinet or drawer number and we kept them all separate. With how long this project took and how exhausted we were at the end, I was so glad to have taken the time to complete this simple little step because we just wanted to be DONE with it.

After you remove all of the doors and drawers, you have to clean all of those along with the frame to make sure there is no residue, food or buildup on anything. Once everything is clean, you de-gloss the doors, drawers and frame with the De-Glosser that comes in the kit.
Once those two steps are complete, you are ready to paint! You’ll apply two coats of paint to the frame, cabinet doors, and drawers with 2-3 hours of dry time in between coats. I brushed on the paint so I cheated and only did one coat on the inside of the cabinet doors since I didn’t mind more of the vintage-y look. If that’s not the look you’re going for then you’ll probably want to do two coats on the inside as well. We didn’t have a sprayer at the time and frankly, being the DIY rookie I was when I did this – using a sprayer never crossed my mind, but I highly recommend that method. The Wagner Paint Sprayer is one of my favorites, and the paint in this kit is pretty thin so you may not have to thin it much (if at all) for a sprayer.
In the photos below, you can see the difference between the cabinet on the left that has two coats, and the one on the right with only one coat.

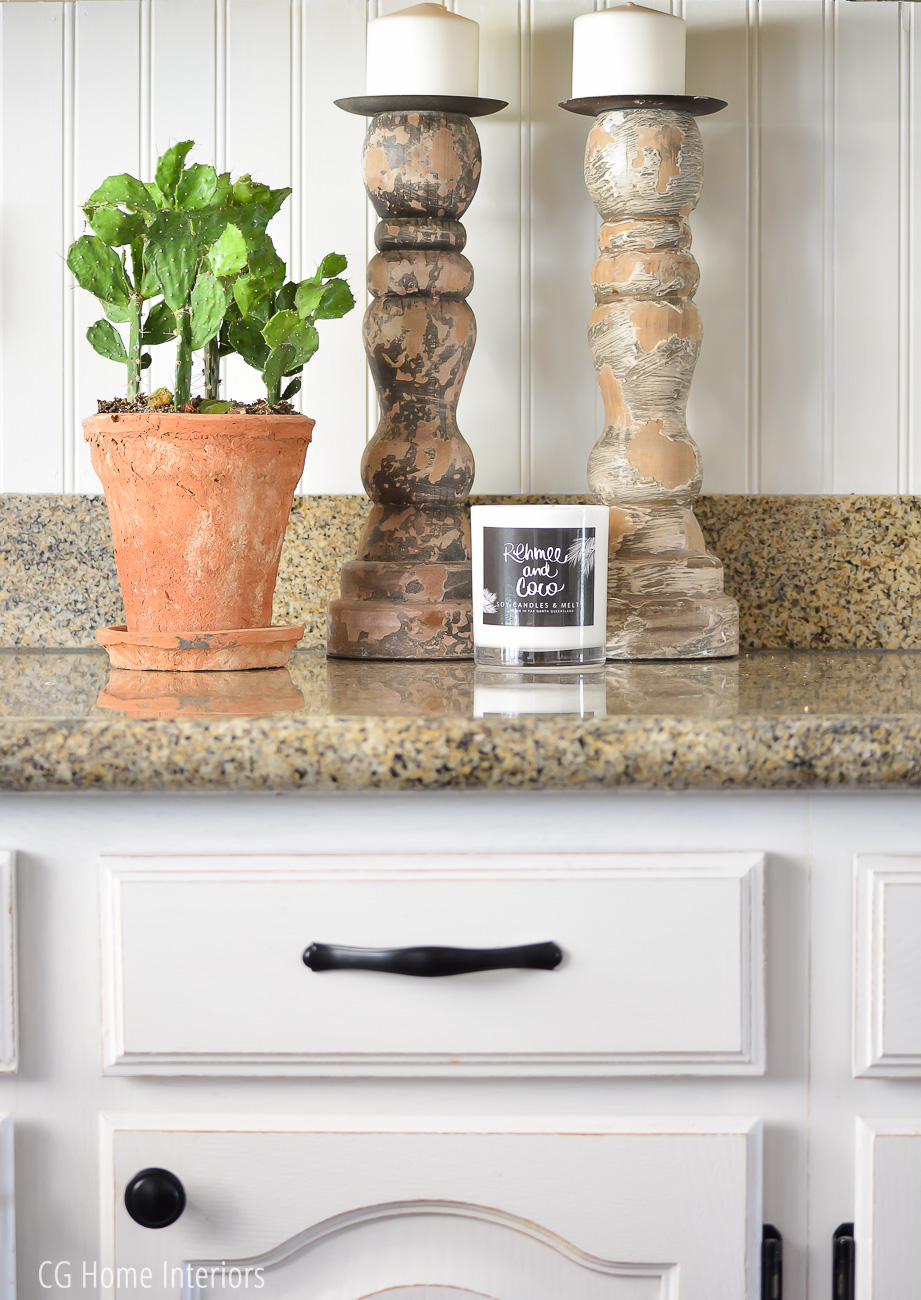
Once the second coat of paint was dry, I took a small piece of 100 grit sandpaper and rubbed it along the edges of the cabinets and drawers to achieve the antiqued look. The photos below help you see the progression from two coats of paint, to two coats of paint with the edges distressed (sanded), and then the final product with the top coat. The top coat added a little gloss and really accentuated the distressed edges. I am so in love with the finished product.
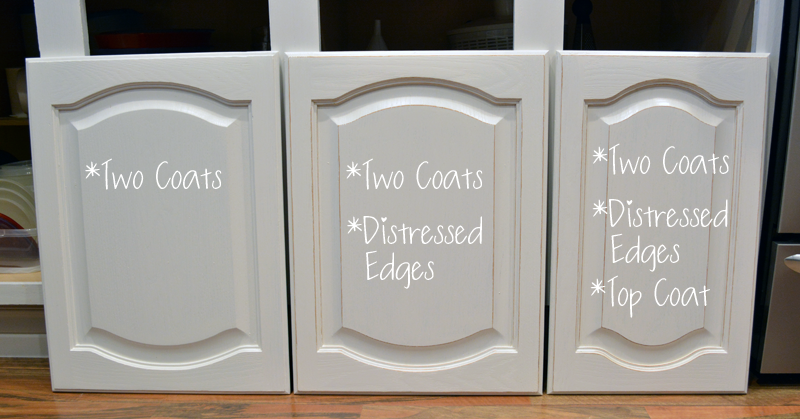
If you aren’t distressing then you would either apply the glaze at this point, or if you’re not using the glaze then you would move on to the top coat. The photos they have on the box next to the color you choose shows what it will look like with the glaze, and without. I chose not to use it. Once I was done distressing the edges of each cabinet, I wiped them down to get as much dust off as I could and then my husband took them outside and used the air compressor to blow off any remaining dust. Once they were dust-free he applied one coat of the top coat. Then we had to wait 12 hours before we could reassemble everything.
Remember: Everything you do to the cabinets and drawers you have to do to the frame as well. Whichever you finish last starts the clock for your 12 hour wait to reassemble.
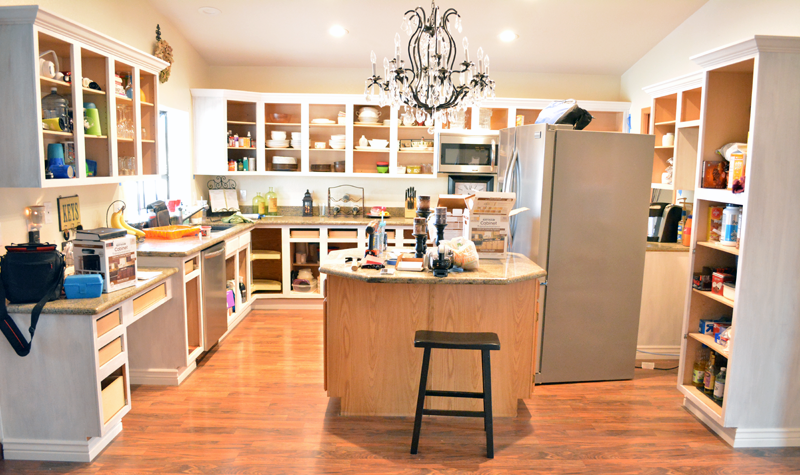
We started this project on a Saturday morning and finished the following weekend on Sunday morning for a total of 8 days (3 full weekend days and 5 weeknights after work). In addition to painting the cabinets we installed hardware, taller crown moulding, 5 inch baseboards around the base of the cabinets, new paint (Wheat Bread by Behr), beadboard on the island and backsplash, and recently I built a wine rack into the desk opening - click here for the wine rack tutorial. Next up in our kitchen is a range hood over the stove, so stay tuned for that!
All in all it was A LOT of work, but if we would have paid somebody to do it then we’d easily be into the thousands right now. We got it all completed for under $1,000 and it’s actually a bit more rewarding knowing we did it all. It has held strong for over two years and I haven’t had to do one single touch up. Well worth the labor and savings!!
If you have any questions about anything I did, leave a comment below and don’t forget to pin your favorite images to Pinterest!
Christina