Call me weird (I’ve been called worse), but I enjoy editing photos even more than taking them. Well, hang on, let me rephrase that. Ever since I learned how to edit in Adobe Lightroom, I enjoy editing photos more than taking them.
It’s kind of therapeutic to take a beautiful photo and make it even more beautiful with a few quick adjustments. I’m no pro photog and I don’t have any fancy expensive lenses for my DSLR so Lightroom saves this amateur’s life! I also want to be clear that my purpose in adjusting any photo is definitely to make it more crisp, but my ultimate goal is to make the photo as close to real life as possible so you can see the room how I’m seeing it through my eyes. Editing portraits is a whole different ball game!
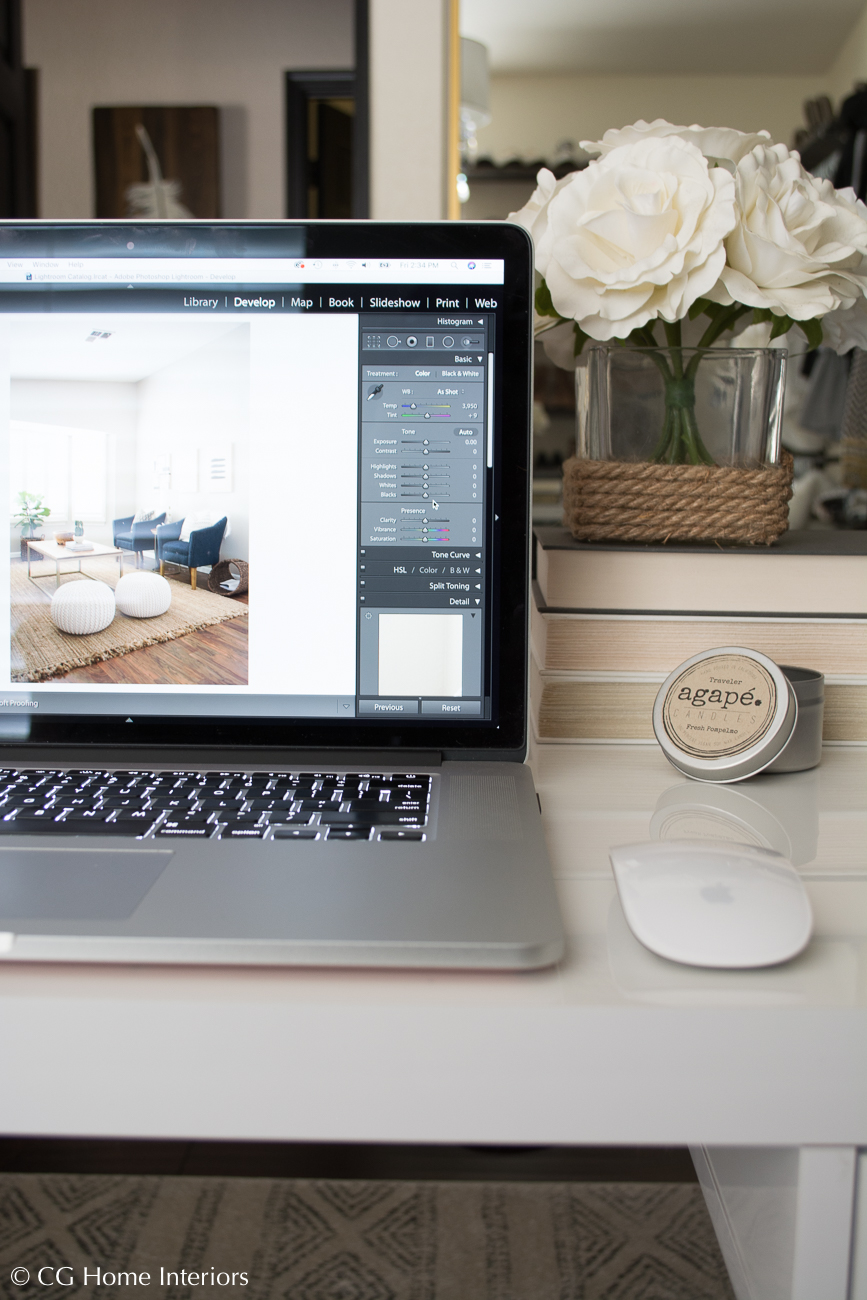
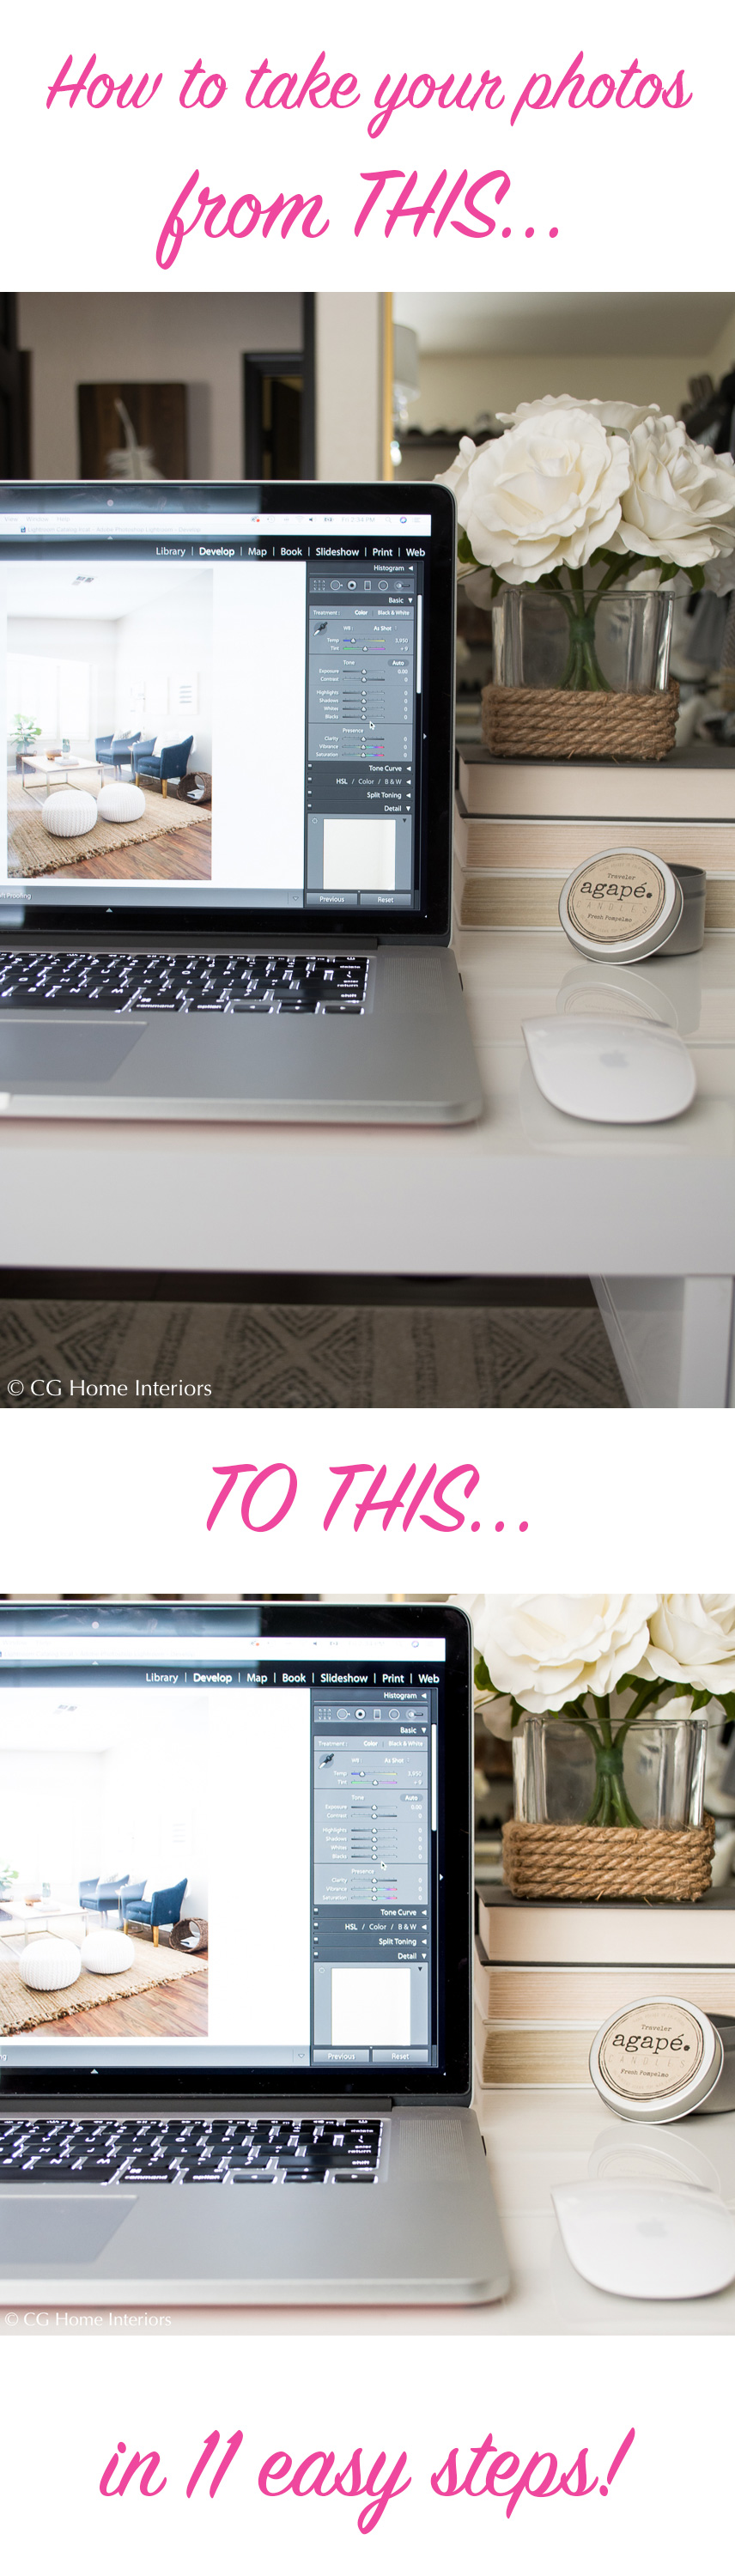
This is the original photo straight out of the camera.
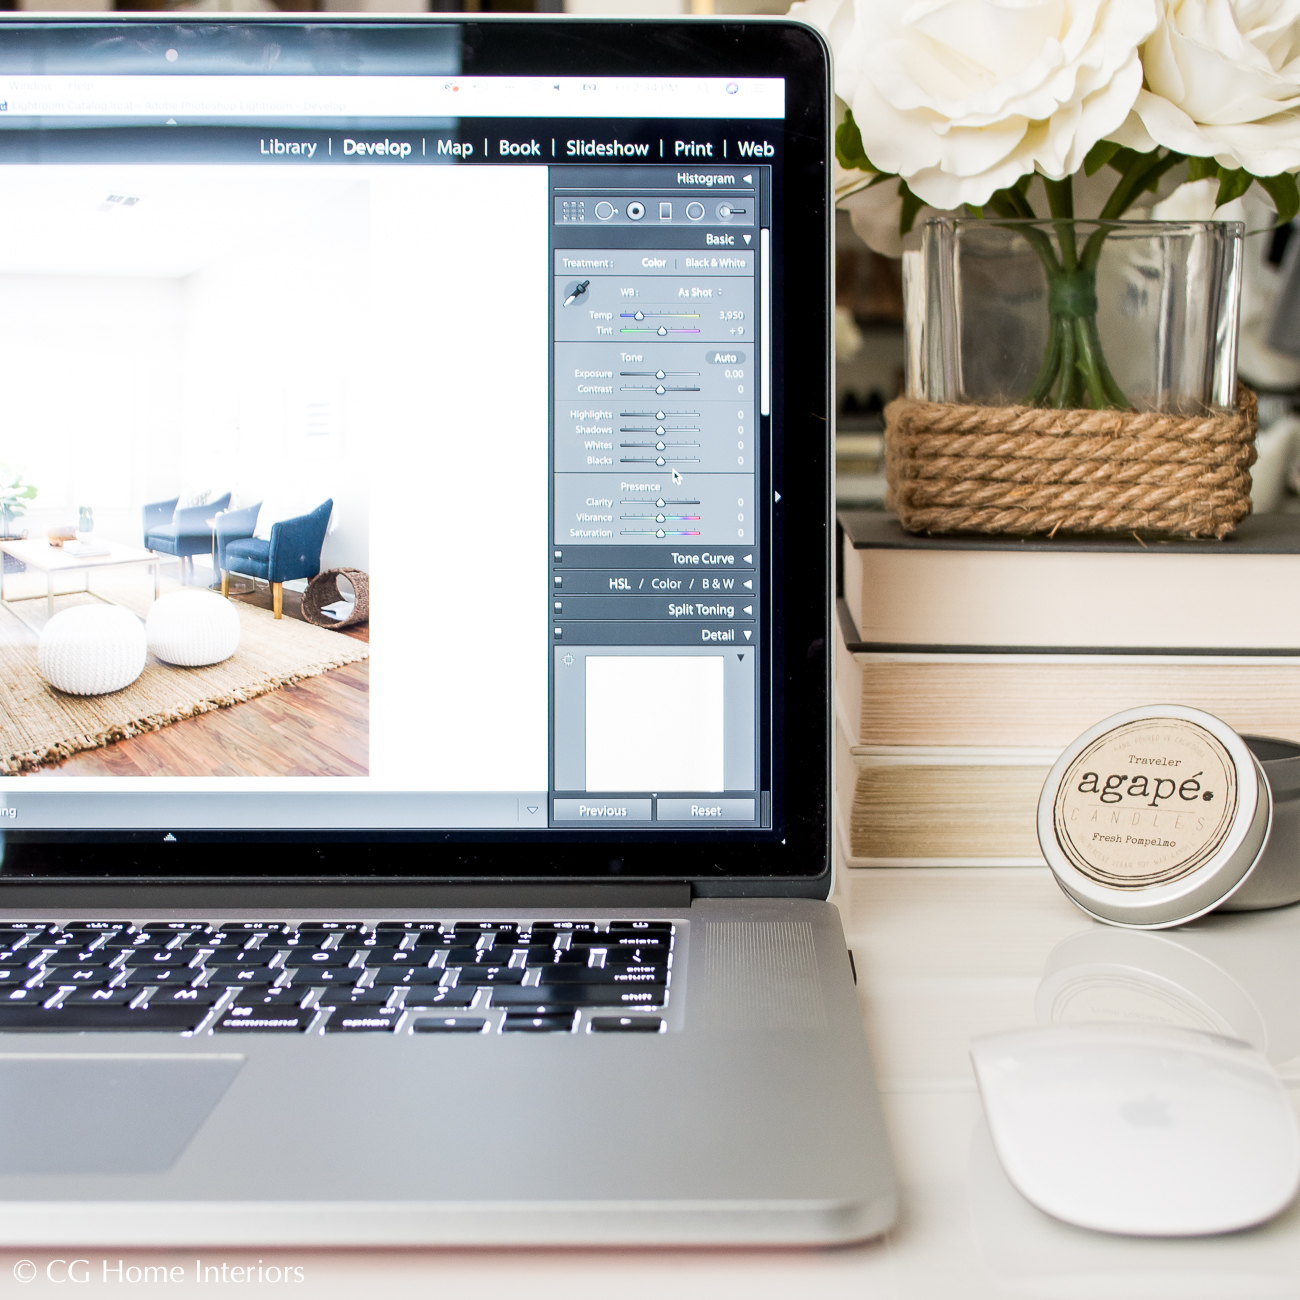
And here is the photo after editing.
In my recent post about creating bright photos in low light settings without flash or artificial light, I asked if you guys wanted to know my steps to quick photo editing in Lightroom – and you did! So here are the 11 adjustments I use almost every time I edit.
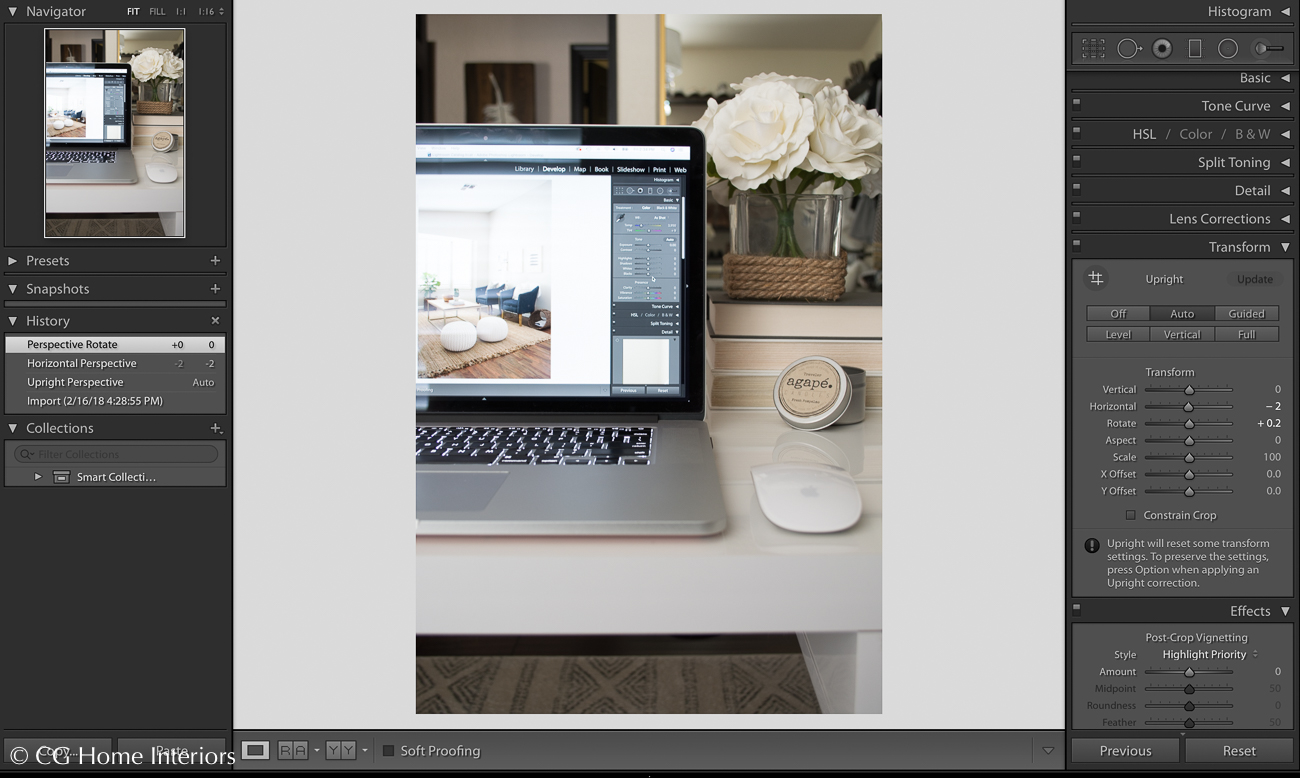
1. ADJUSTMENT
The first thing I do is adjust my photo to achieve the correct perspective. To do so, open the TRANSFORM tab and click AUTO. Sometimes the auto adjustment doesn’t work so well and you may need to turn that off and use GUIDED to make the adjustments manually. I used auto on this photo but had to make a couple other manual adjustments.
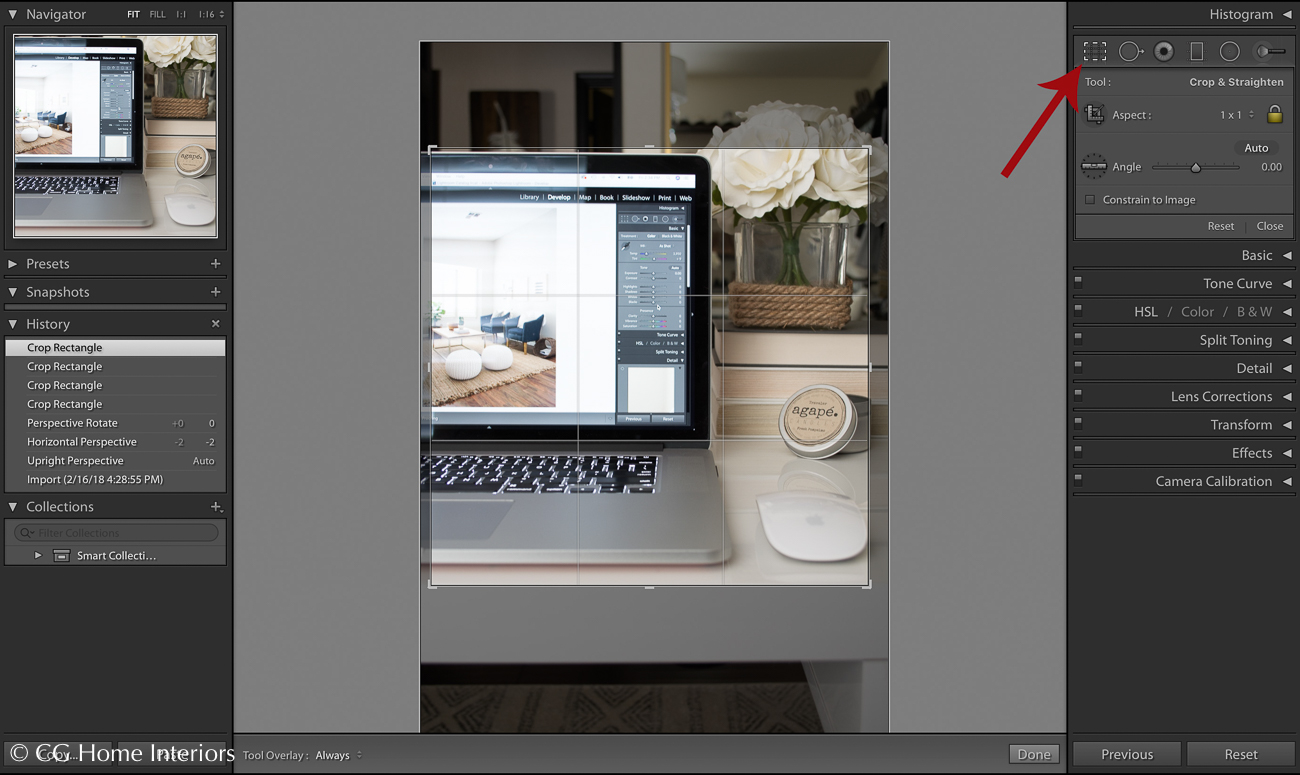
2. CROP
Next, I crop the photo which is either just trimming the excess white off of the photo from adjusting it in the first step, or cropping it down to get only what I want in the photo. I only wanted a few things in this photo so I cropped quite a bit off.
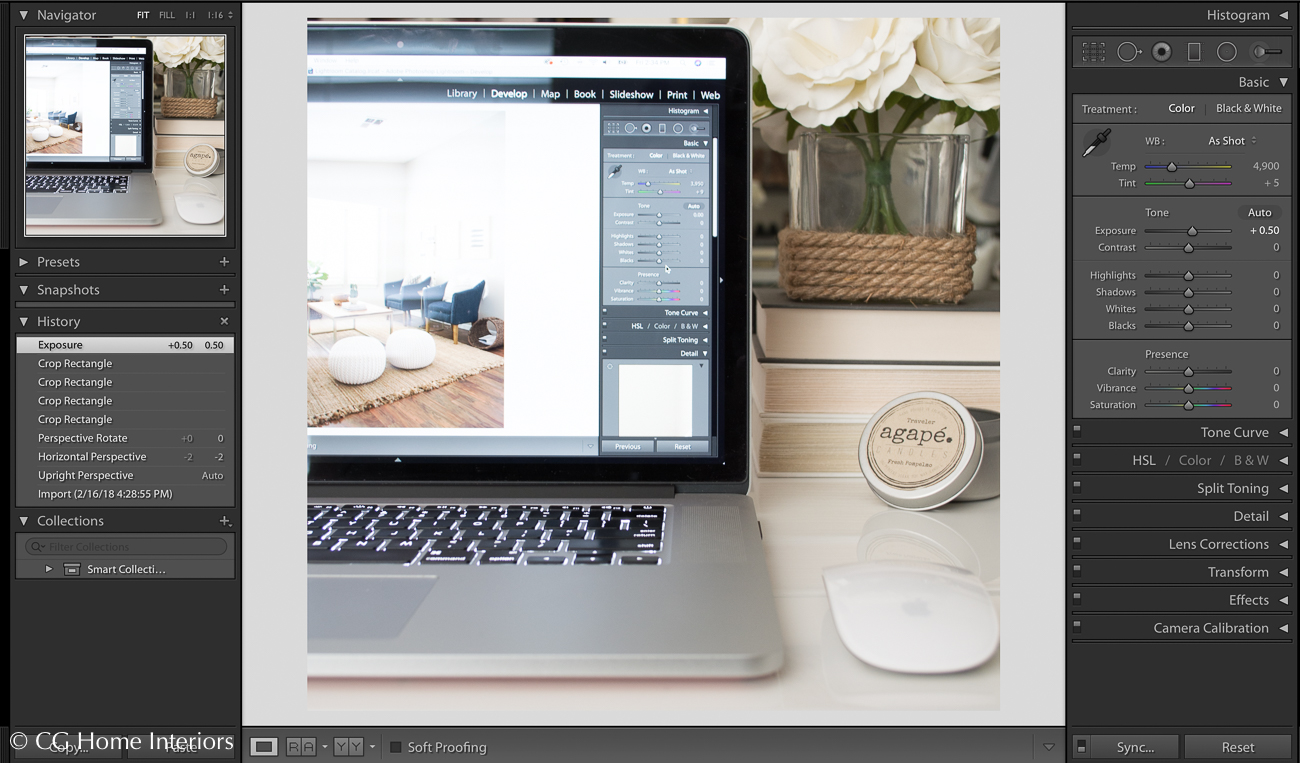
3. EXPOSURE
Next I open the BASIC tab and do most of my edits here. Depending on how much natural light I’m able to capture in the photo, or the room I’m shooting, I usually increase the exposure anywhere from +.10 to +.50. Rarely do I expose more than that, but sometimes it is necessary.
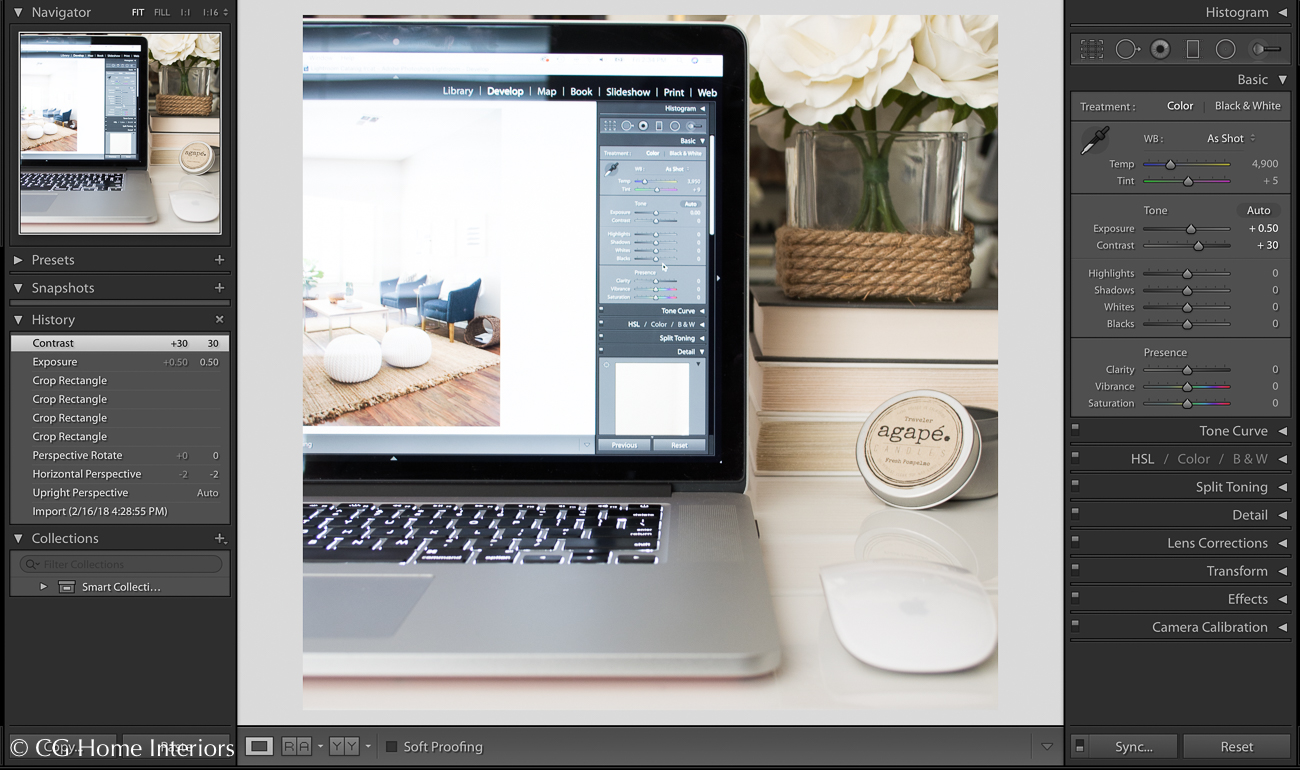
4. CONTRAST
When you increase the exposure you tend to lose some of the contrast so I typically adjust mine anywhere from +10 to +30. Oftentimes I’m somewhere in the middle of that range but in this particular photo I have a lot of light colored items so I want more contrast to keep it from being washed out.
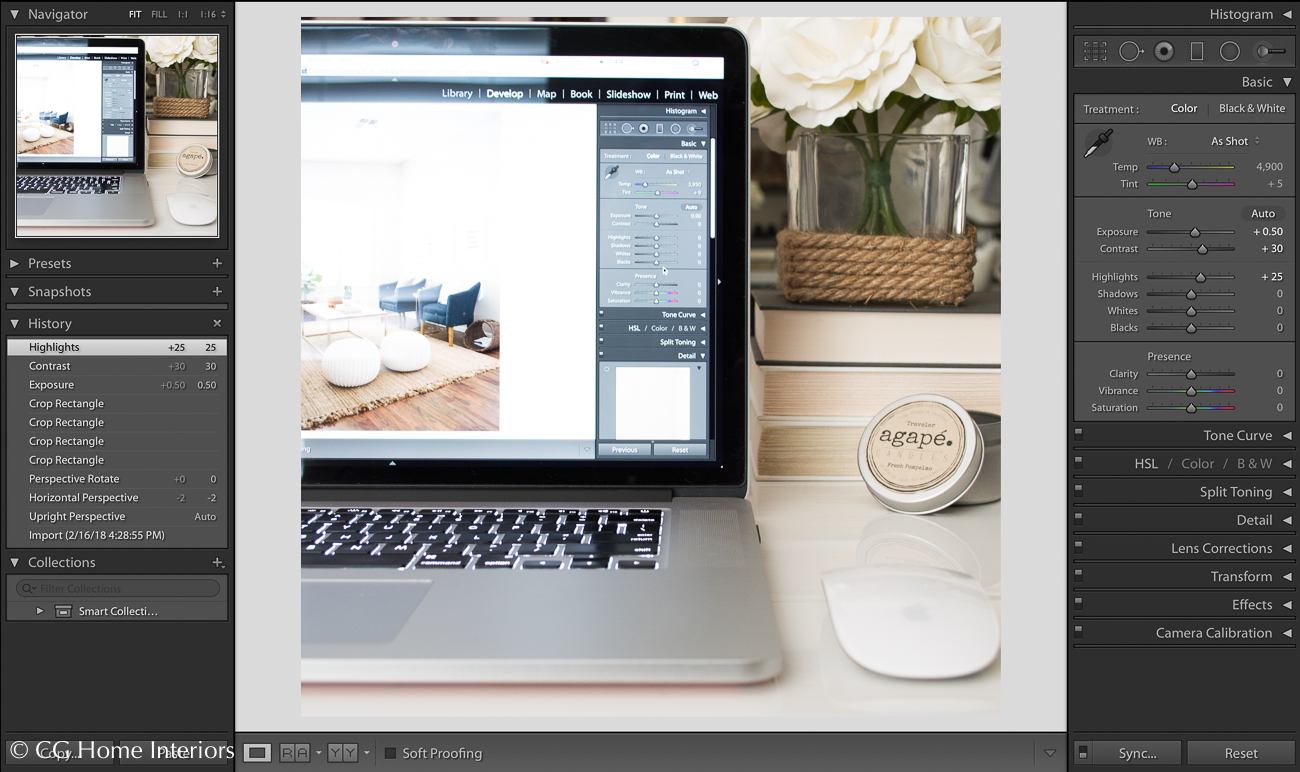
5. HIGHLIGHTS
I normally decrease my highlights, but this photo is an exception since I want my whites bright so I increased it to +25, but typically I go anywhere from -10 to -45. I play around with it in that range until it appears to be more true to color.

6. SHADOWS
I’m not a fan of dark shadows, so I probably go a little crazy on this setting but this will all come down to your style and personal preference once you’re editing your own photos. My shadow settings are typically anywhere from +10 to +50. It’s oftentimes on the lower end of that scale, but just depends on the room, the lighting, etc.

7. WHITES
I usually change this setting anywhere from +10 to +20 to make my whites a bit whiter.
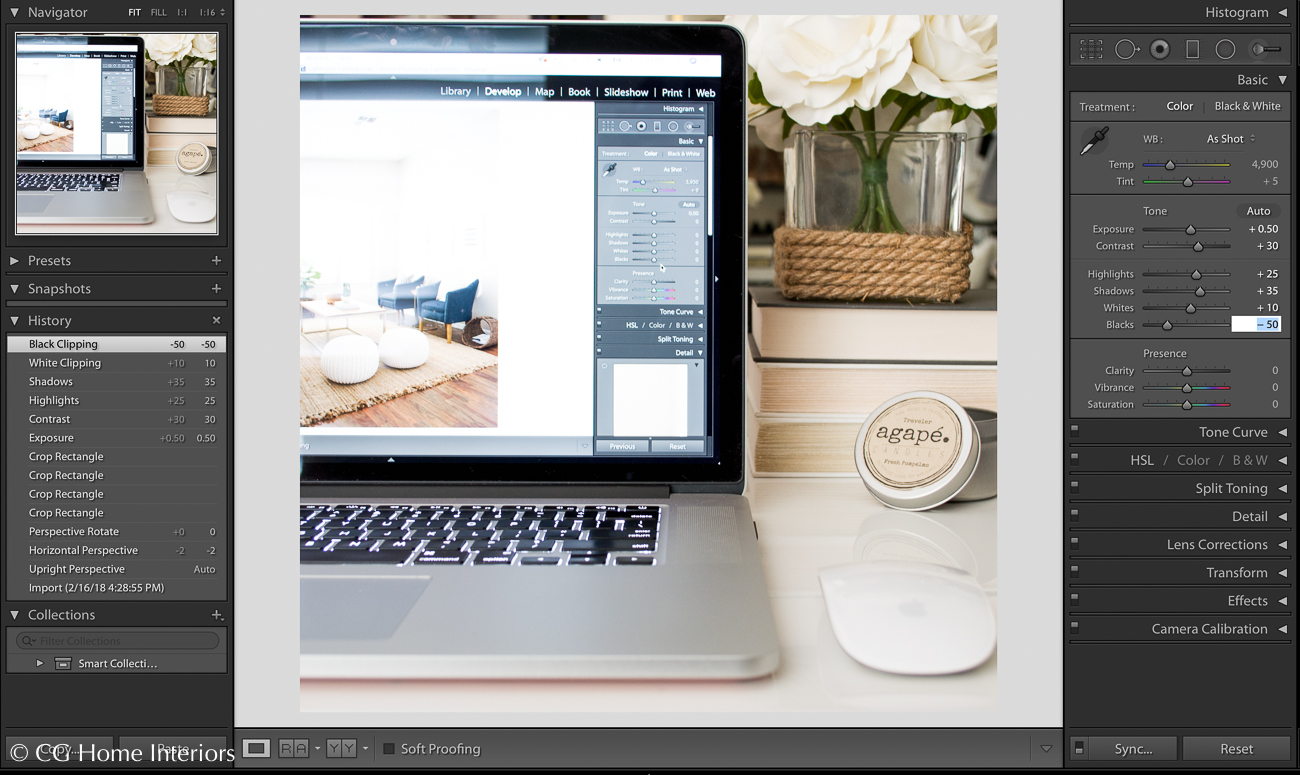
8. BLACKS
This setting varies based on the photo. I usually change this setting to be anywhere from -5 to -15, but in this particular photo I went all the way down to -50 to really emphasize the darker tones since most of the items are so light.
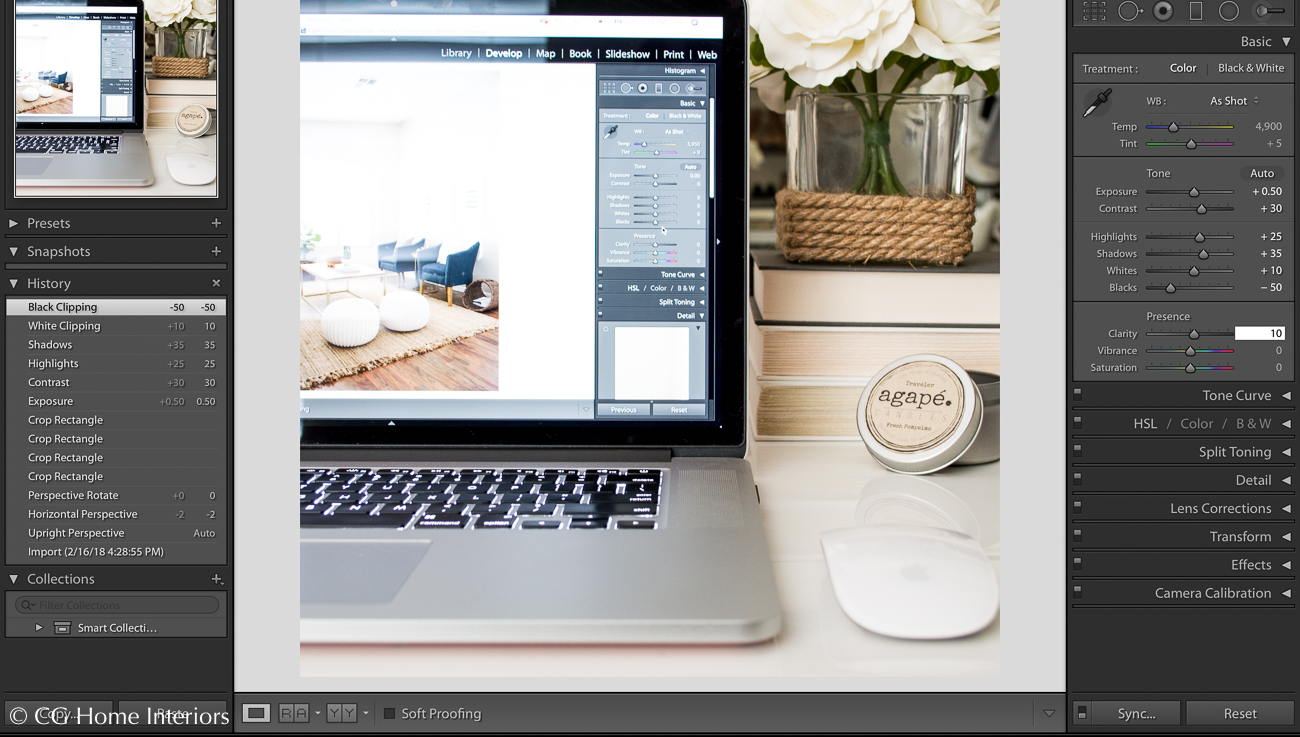
9. CLARITY
This setting will darken your photo so I usually set this to +5 to give it a little extra crispness but not too much darkening. On rare occasions, such as this photo, I set it to +10 because there aren’t very many dark tones in the photo to begin with.
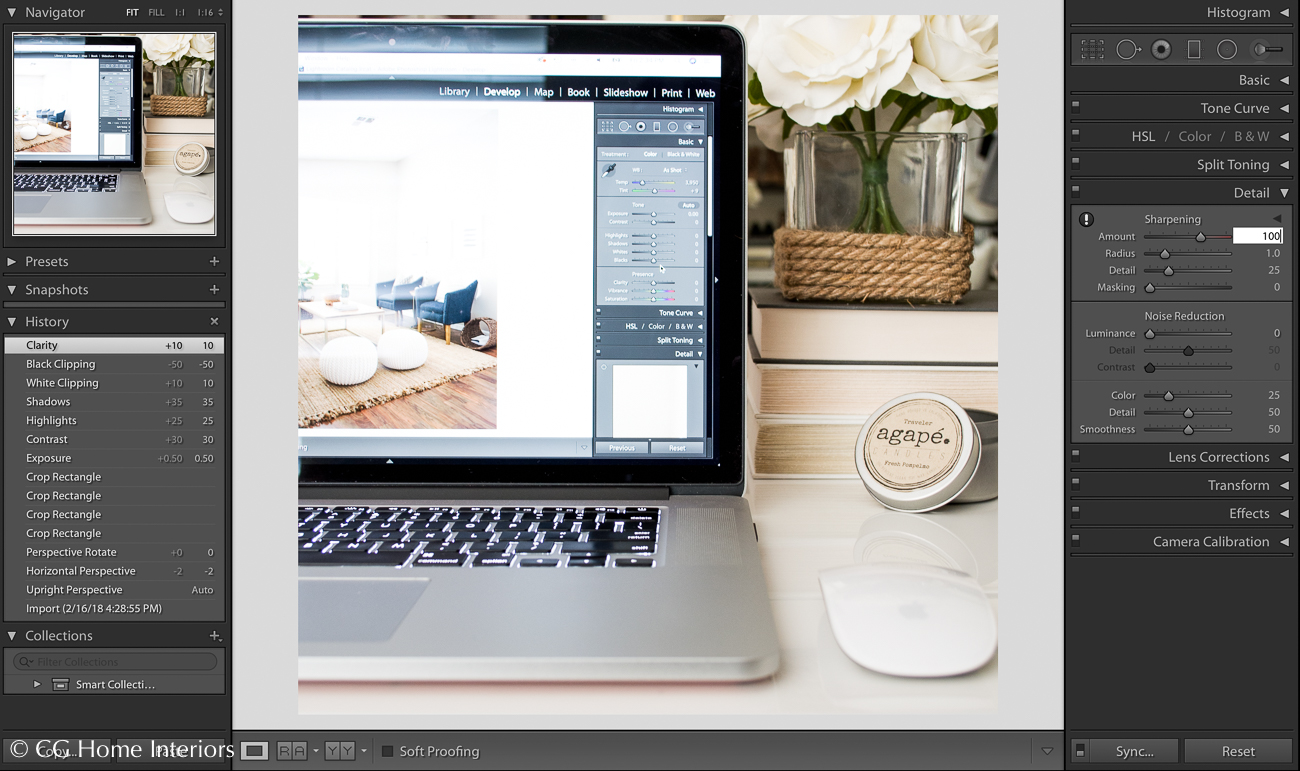
10. SHARPENING
As I’ve mentioned before, I love a crisp photo and I use auto focus more often than not on my camera so it’s not as sharp as it could be. If I have time, I will use my tripod and manual focus - but that’s not often. If I’m shooting a room or home décor then I usually crank this baby all the way up to +100, but if I’m adjusting a portrait then I usually don’t go over +50 to +60.
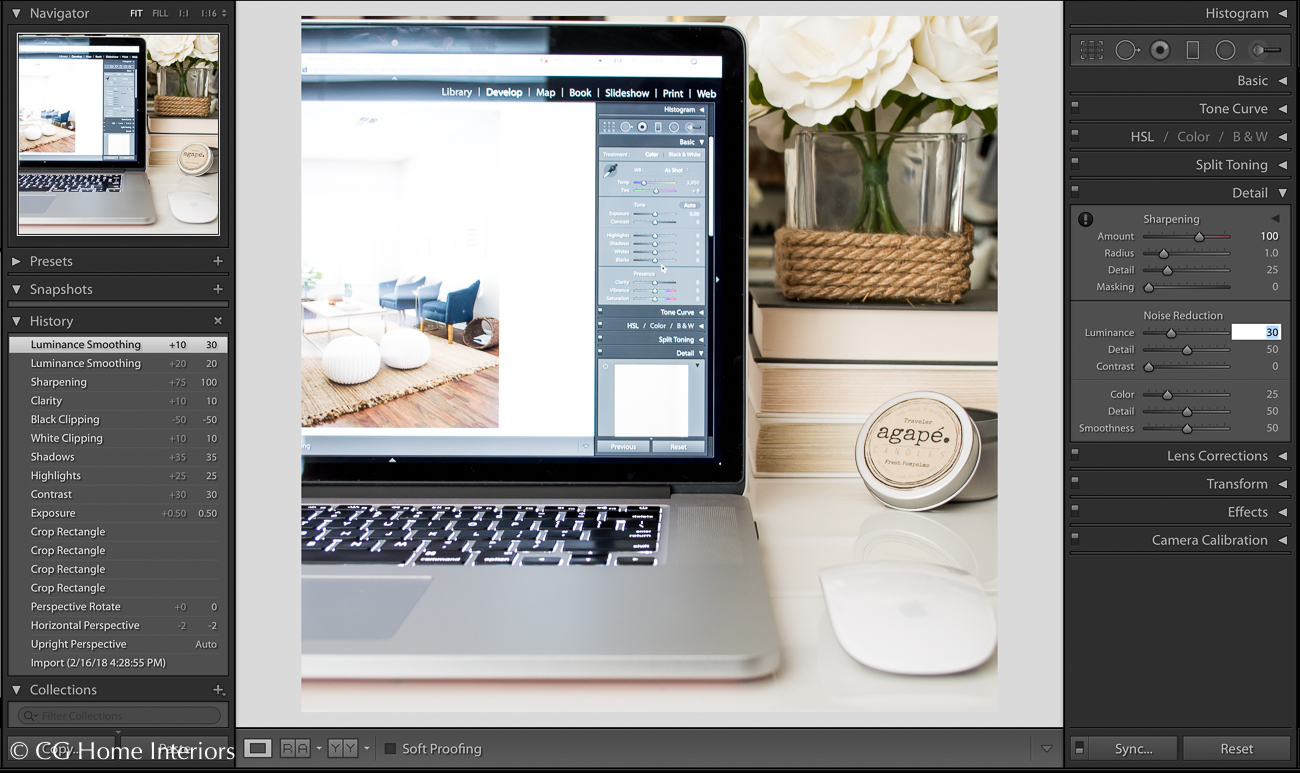
11. LUMINANCE
Since I sharpen my photo so much, I love to soften it a bit with this setting and usually go anywhere from +20 to +40. This setting can make the photo appear blurry, so I just play around with it until it looks smooth but still sharp.
Clearly, imagery is all about your style and preference so if you’re cringing at my photos and the edits I use then that simply means we have different styles and this probably isn’t the best guide for you. On the contrary, if you like my photos then now you know how to achieve a similar style, and with a little practice and repetition you’ll be able to cut your editing time in half.
Also, if you find yourself using the same edits a lot then you can save those settings as a PRESET in the menu on the left hand side of Lightroom (above your photo HISTORY). I don’t use this often but it could be a huge timesaver if your lighting is pretty consistent in your photographs.
Let me know if you have any questions or found this information helpful by leaving a comment below!
XO,
Christina
P I N T H I S I M A G E