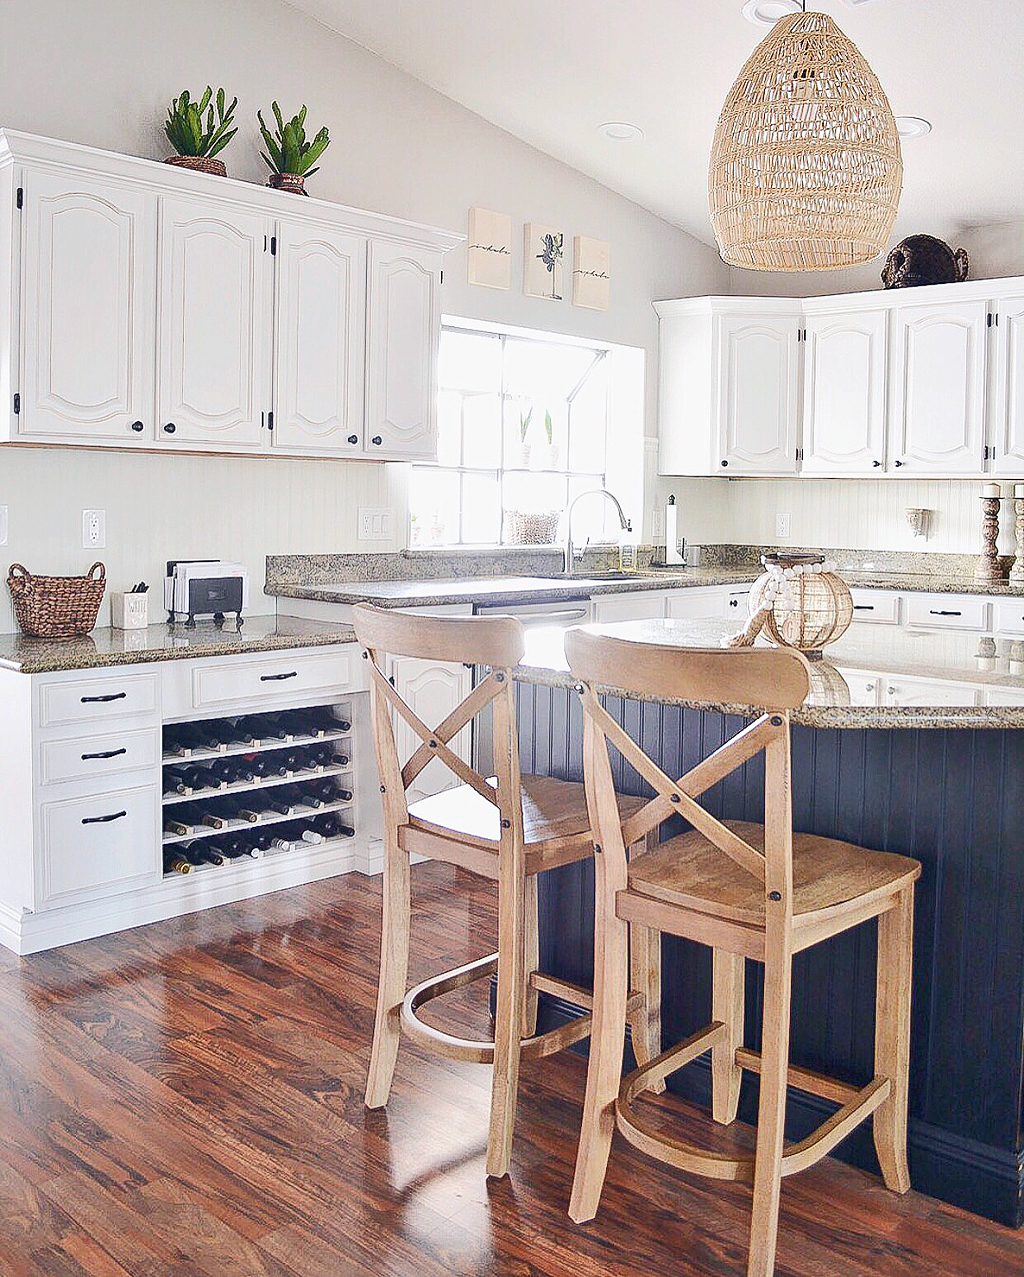
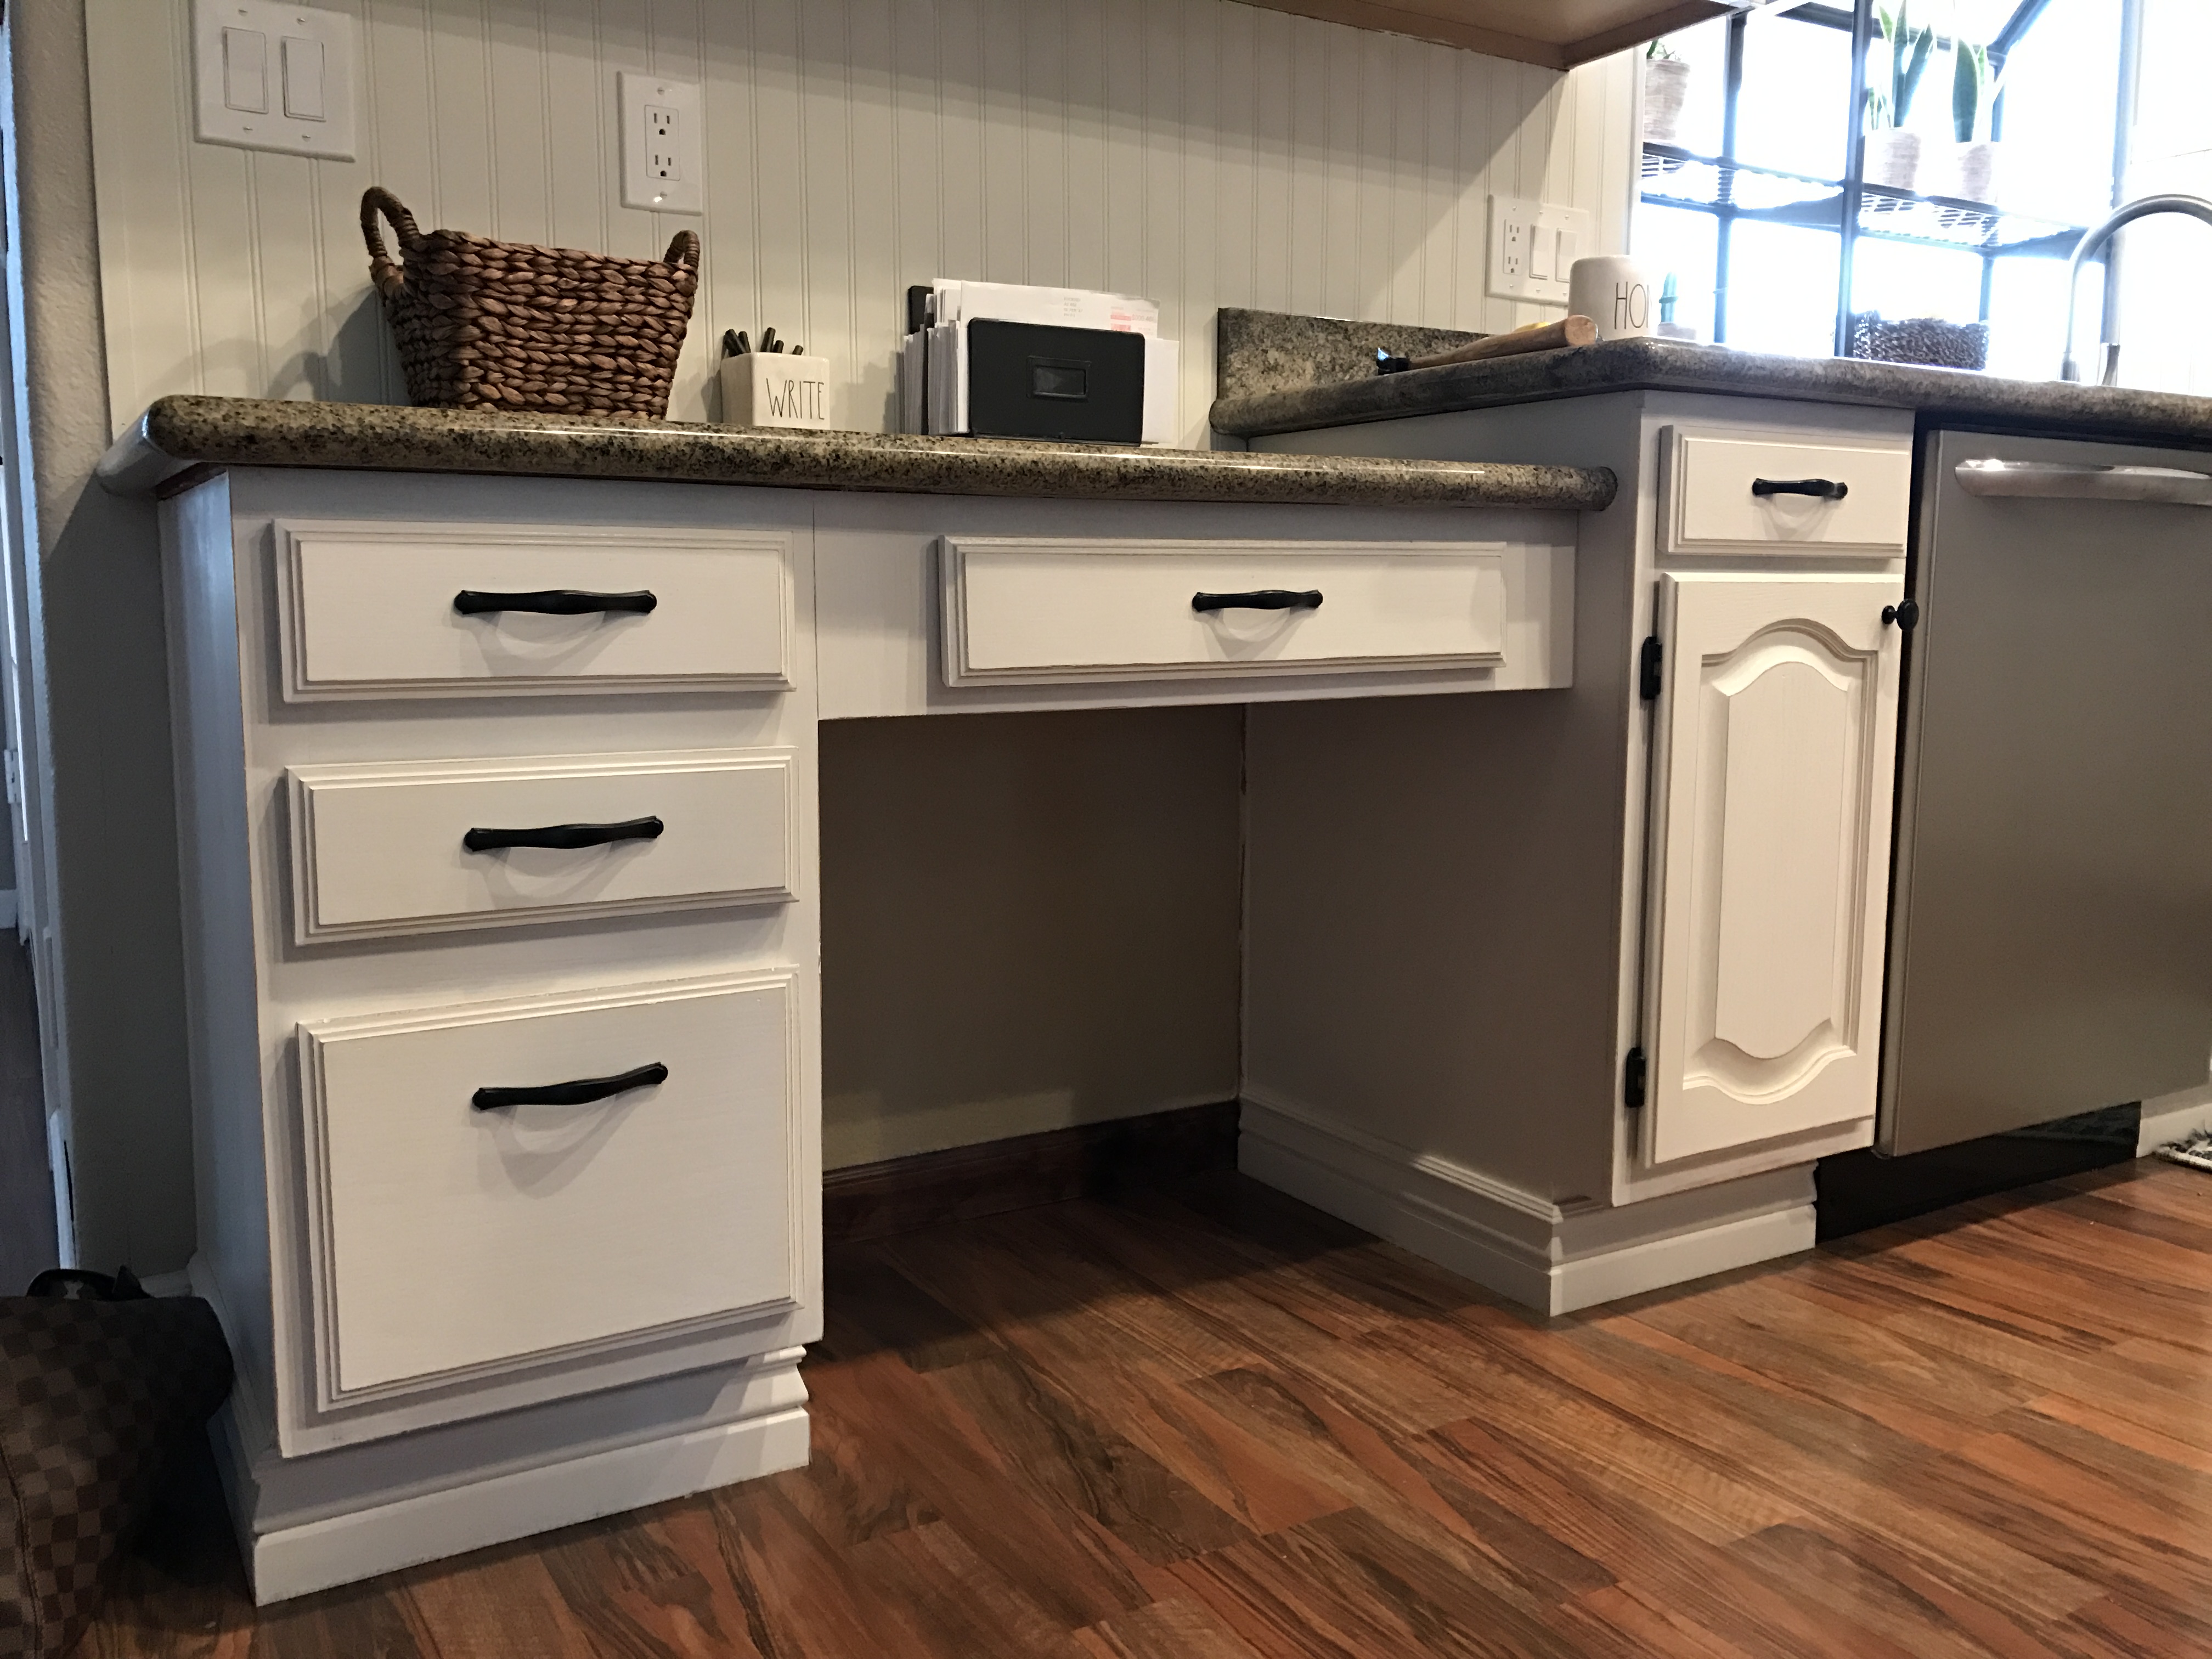
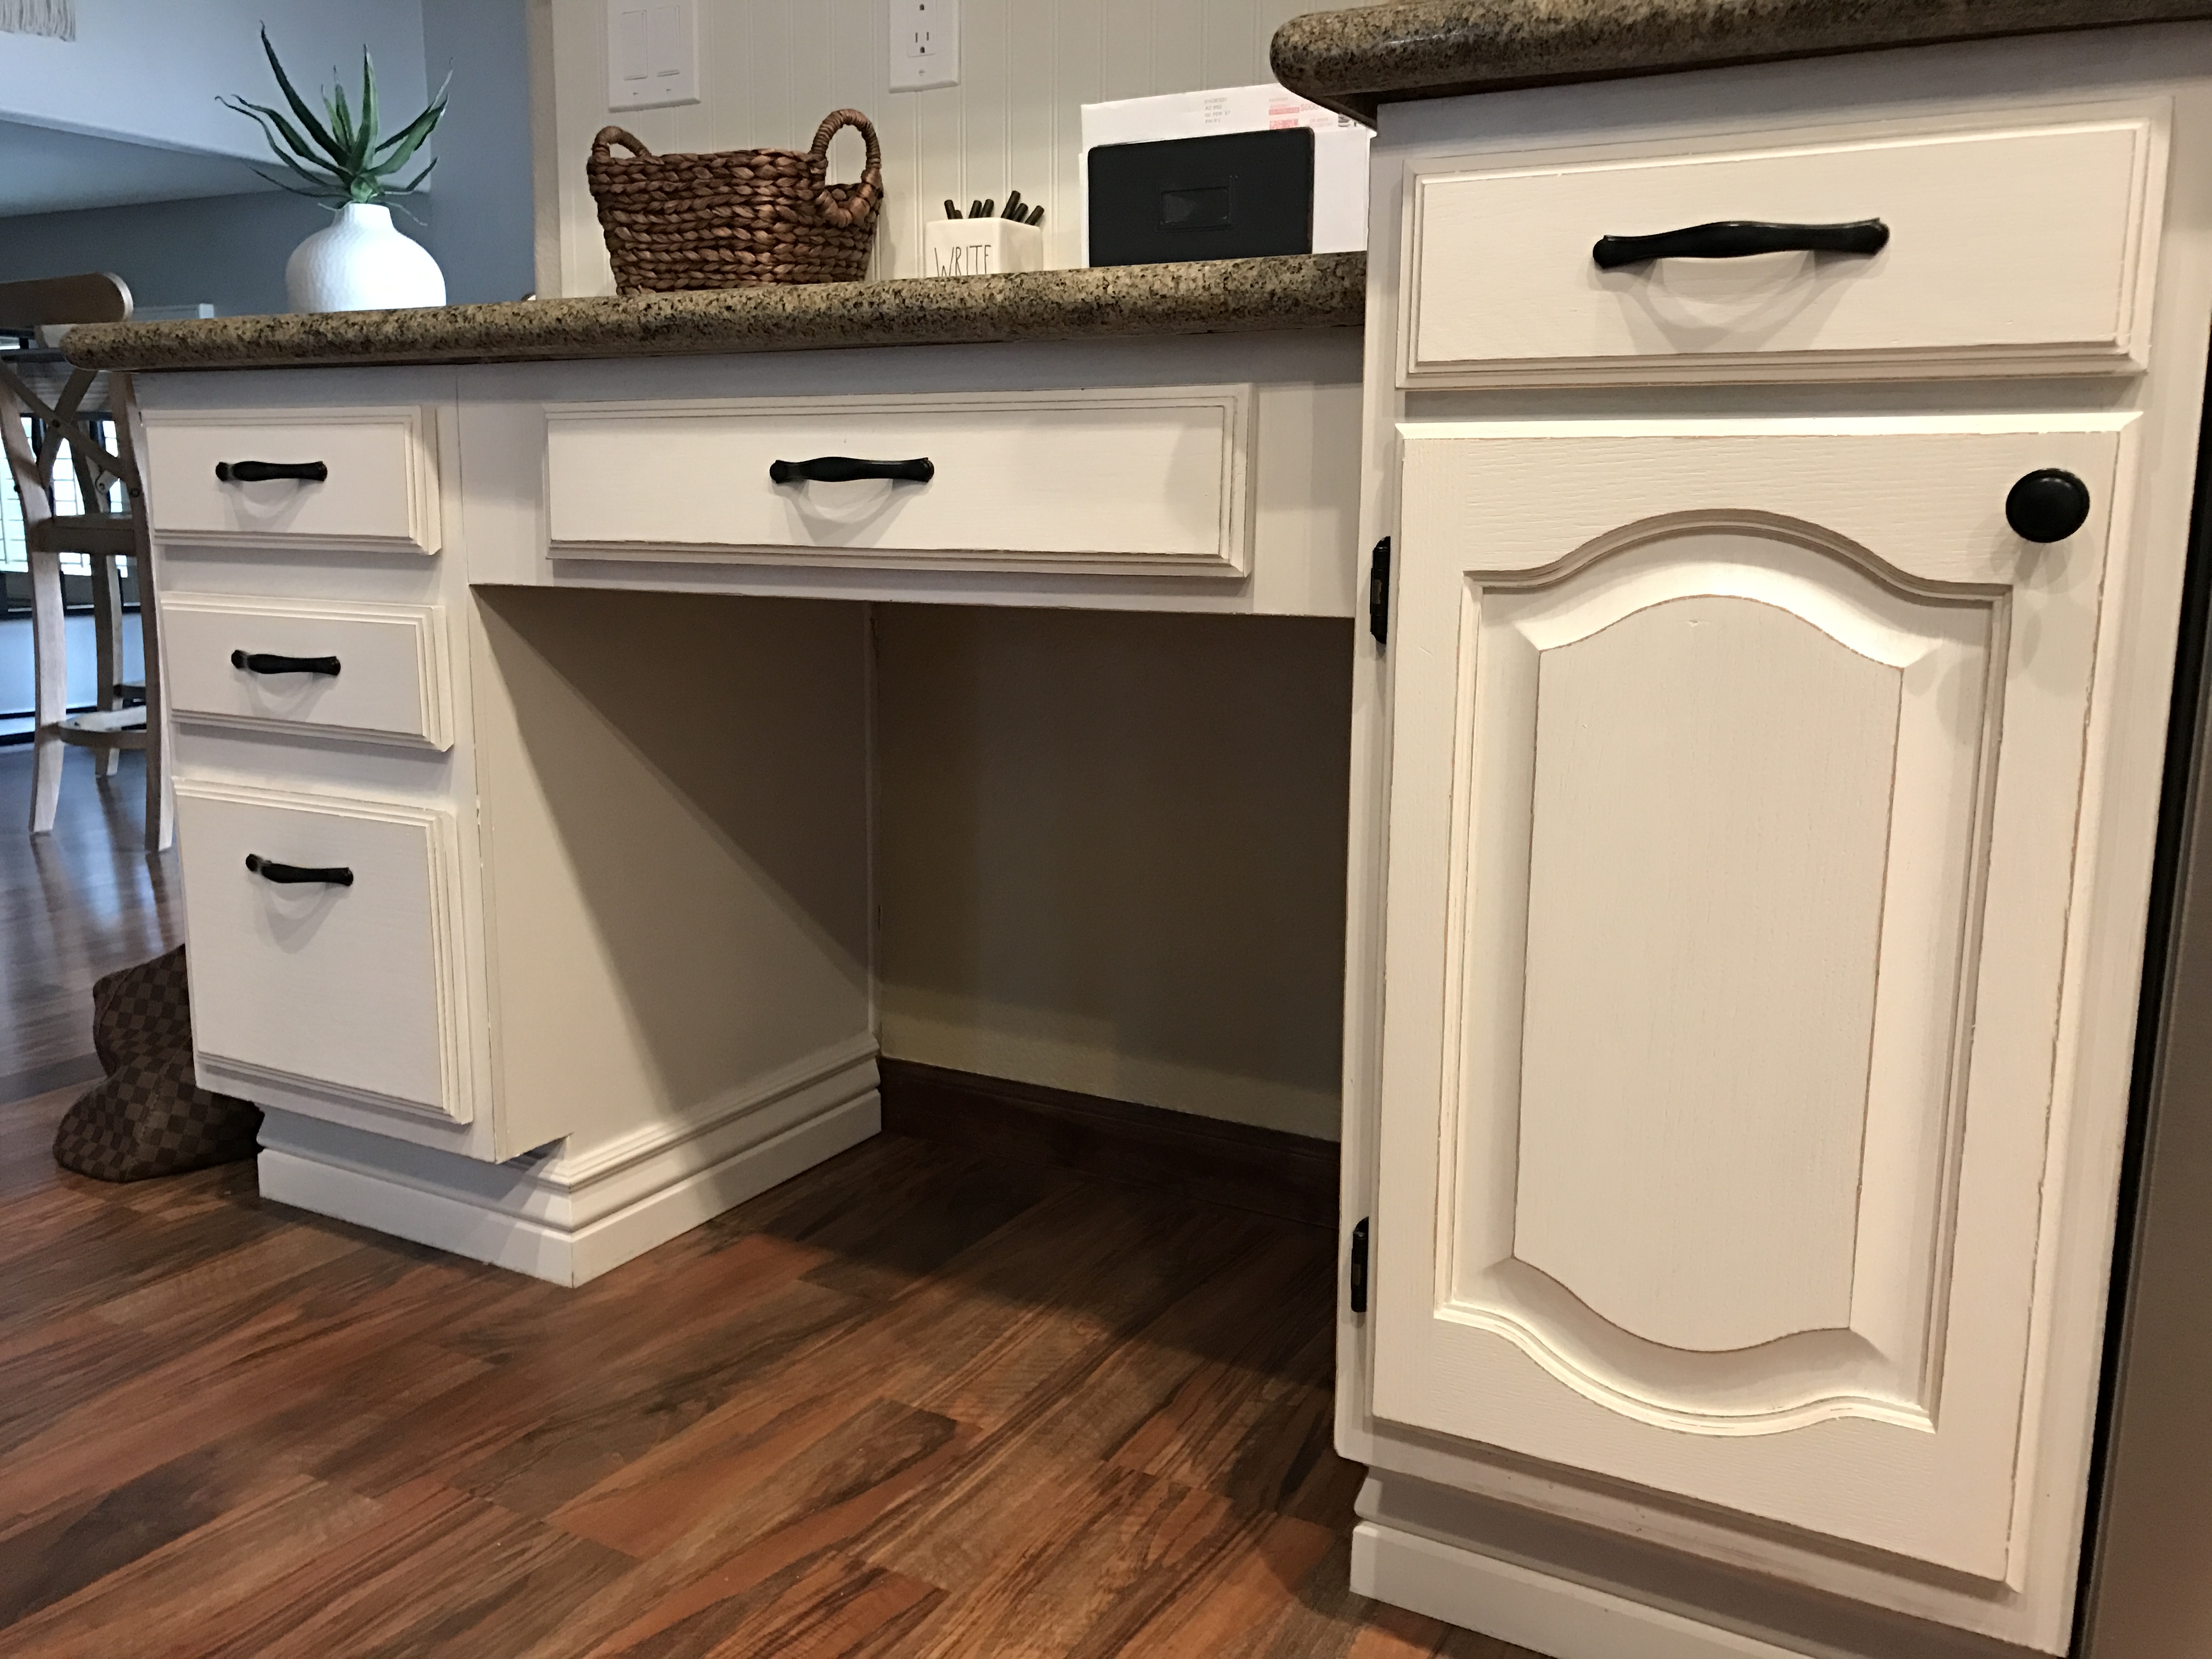
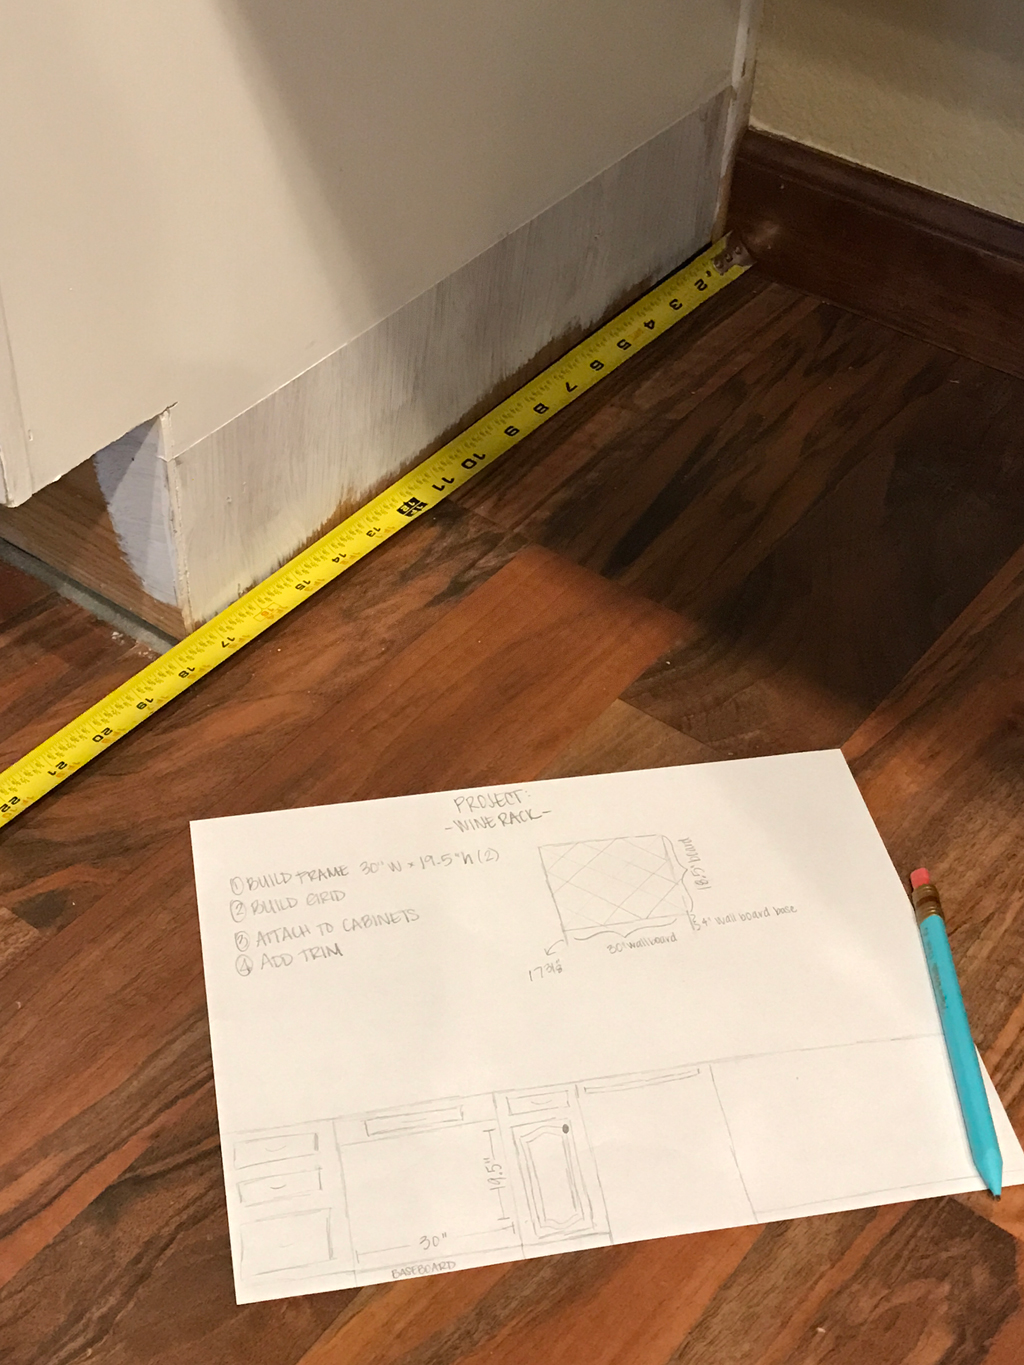
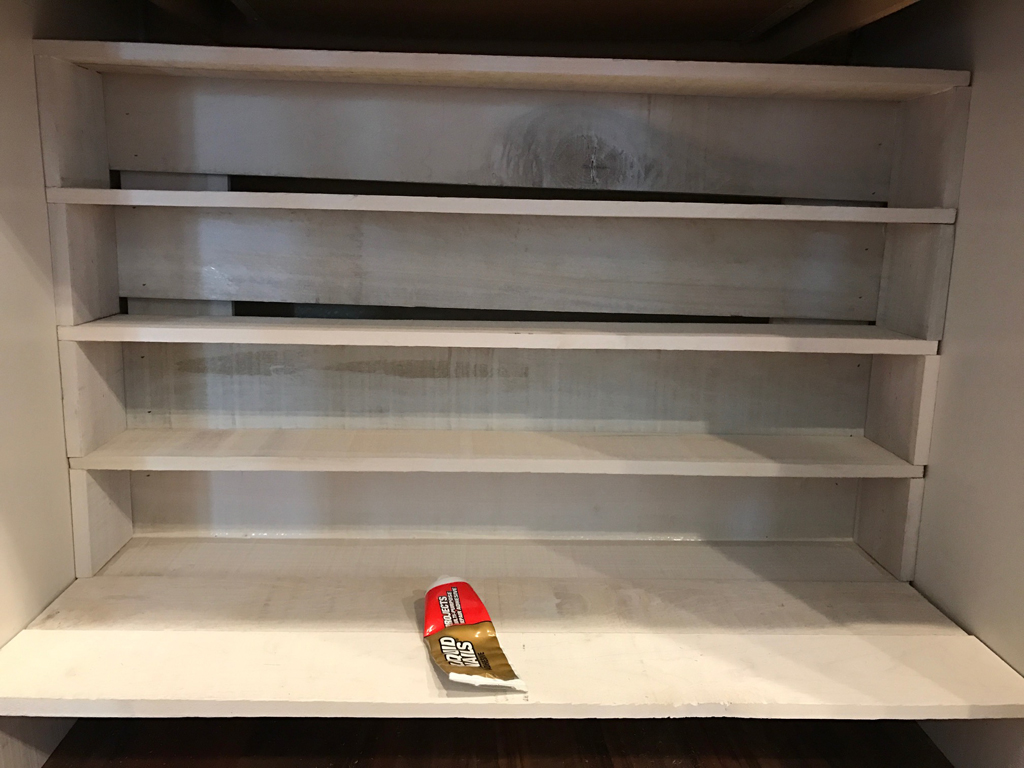
If your love for wine runs as deep as mine and you’re a fellow owner of that awkward built-in kitchen desk from the 90s, then this DIY might just change your life.
I’m not even exaggerating.
This is quite possibly one of the easiest DIYs I’ve done to date, and like most DIY projects I do I just flew by the seat of my pants and changed my plans as I went (which may or may not have contributed to why I didn’t do this as a video tutorial – HA!!). I've said it once and I'll say it a million times, Weaber Lumber's Wall Boards are SO versatile and you can use them for much more than just a feature wall, like I did here by adding a backing to the entryway table I built.
I originally wanted to do a criss-cross wine rack because I think it’s the most appealing aesthetically, but I didn’t have the right resources (read: power tools or wood-working knowledge) to make that vision come to life. It also would have been much easier if the opening I was working with was a perfect square, but since it wasn’t I thought about doing a plain ol’ grid to fill my rectangular opening with symmetry. It wasn’t my favorite idea, but doable. Or so I thought. Again, I didn’t have the right power tools to notch out the boards and fit them together. Then came the idea you see below, which I like way more than the grid anyway. Isn’t it great when things just work out?!
On to the fun part…
SUPPLIES:
- Weaber Lumber Wall Boards (quantity will depend on the size of the opening – I used 2 boxes for a 30in x 19.5in opening)
- 1" Square Dowels (cut to 11” each)
- Miter Saw
- Nail Gun
- 1” Nail Brads
- 5/8” Nail Brads
- Liquid Nails
- Level
- Safety Glasses
- Trim/Moulding of your choice for framing
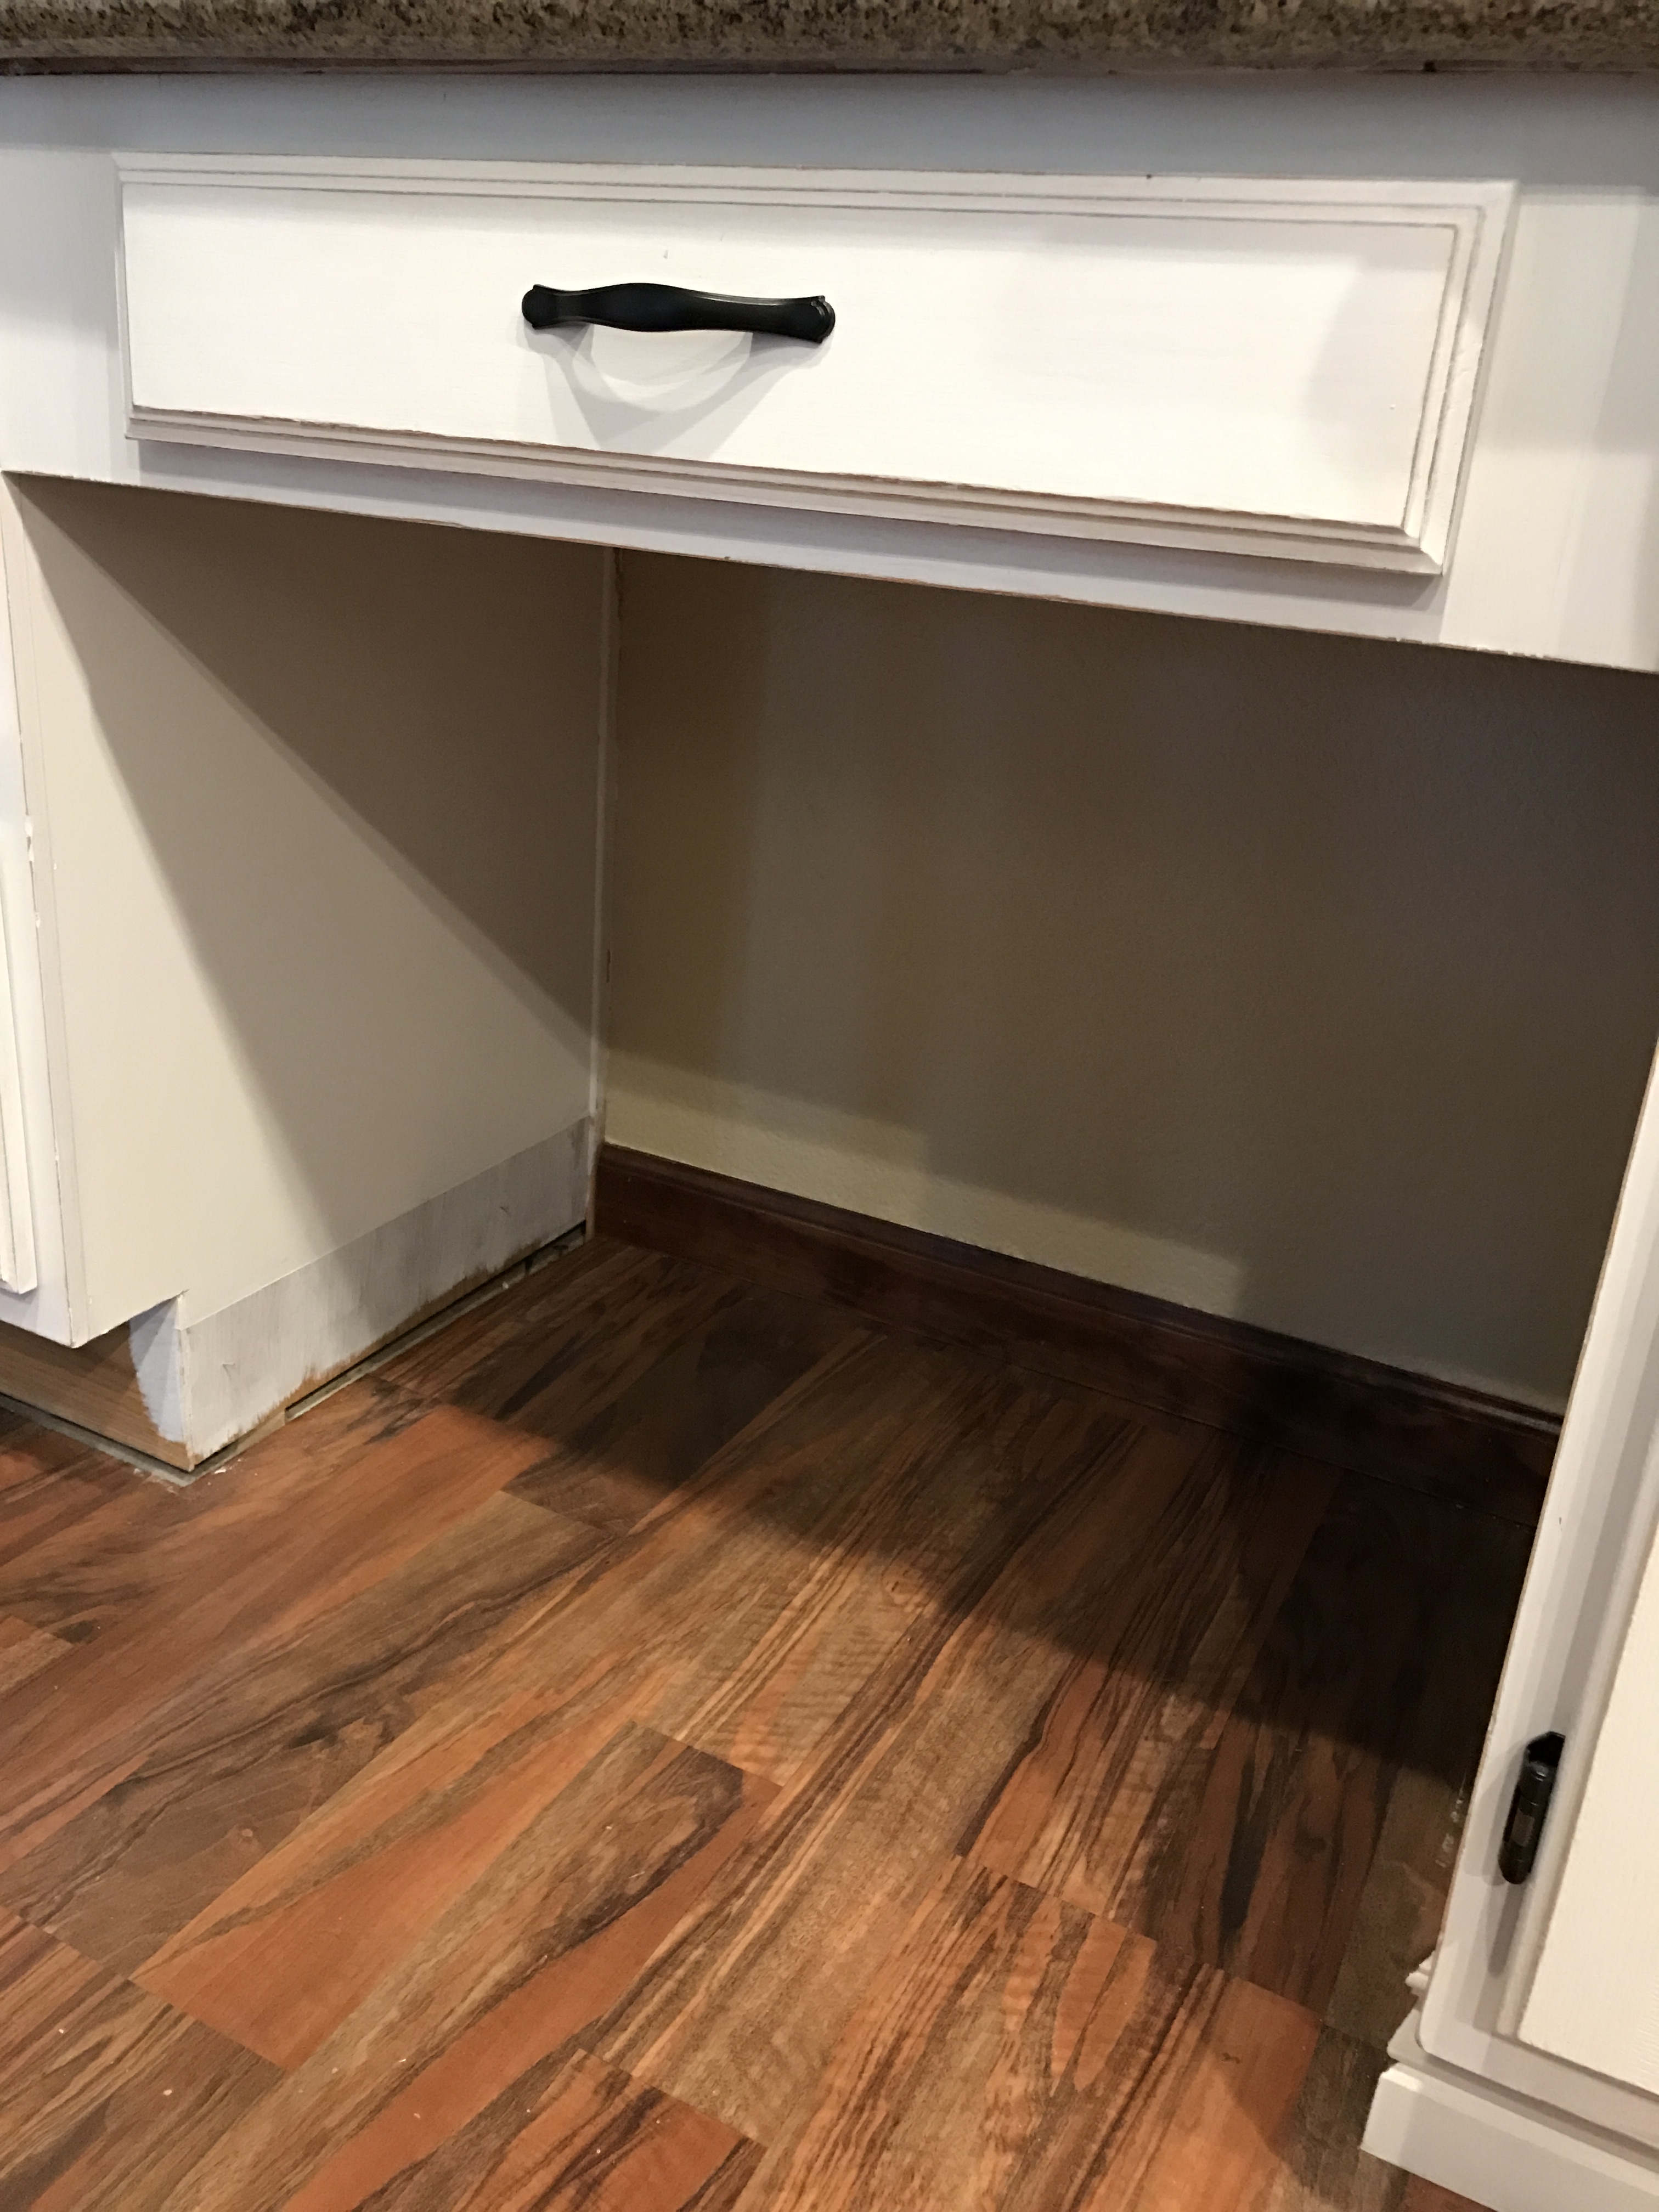
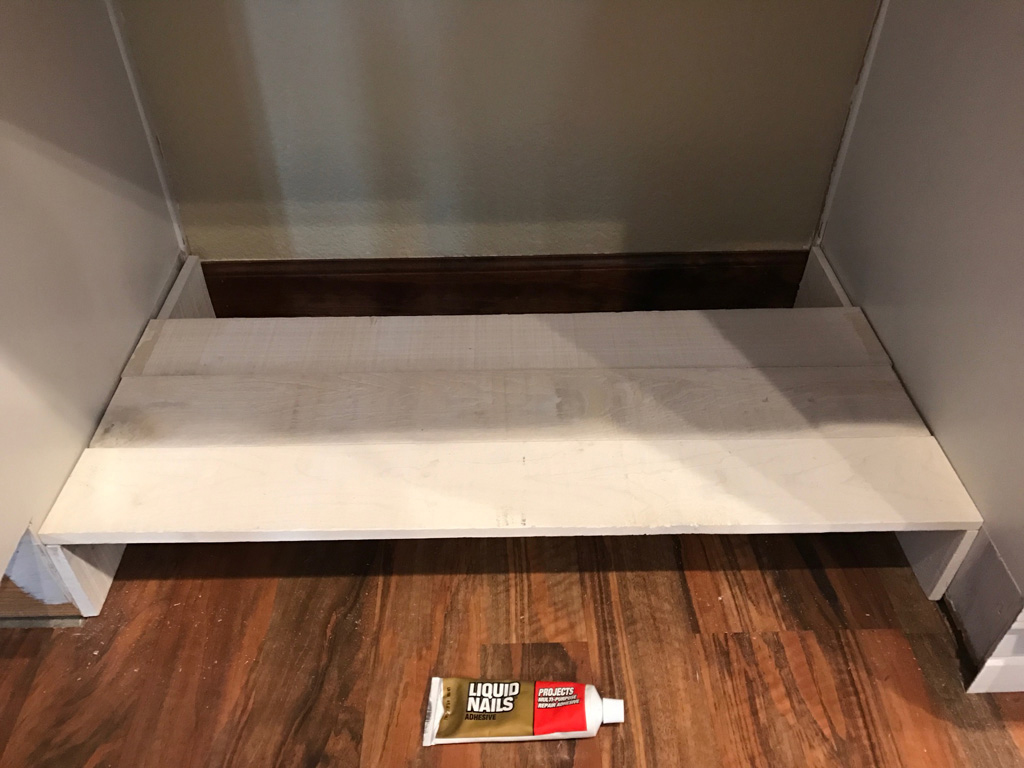
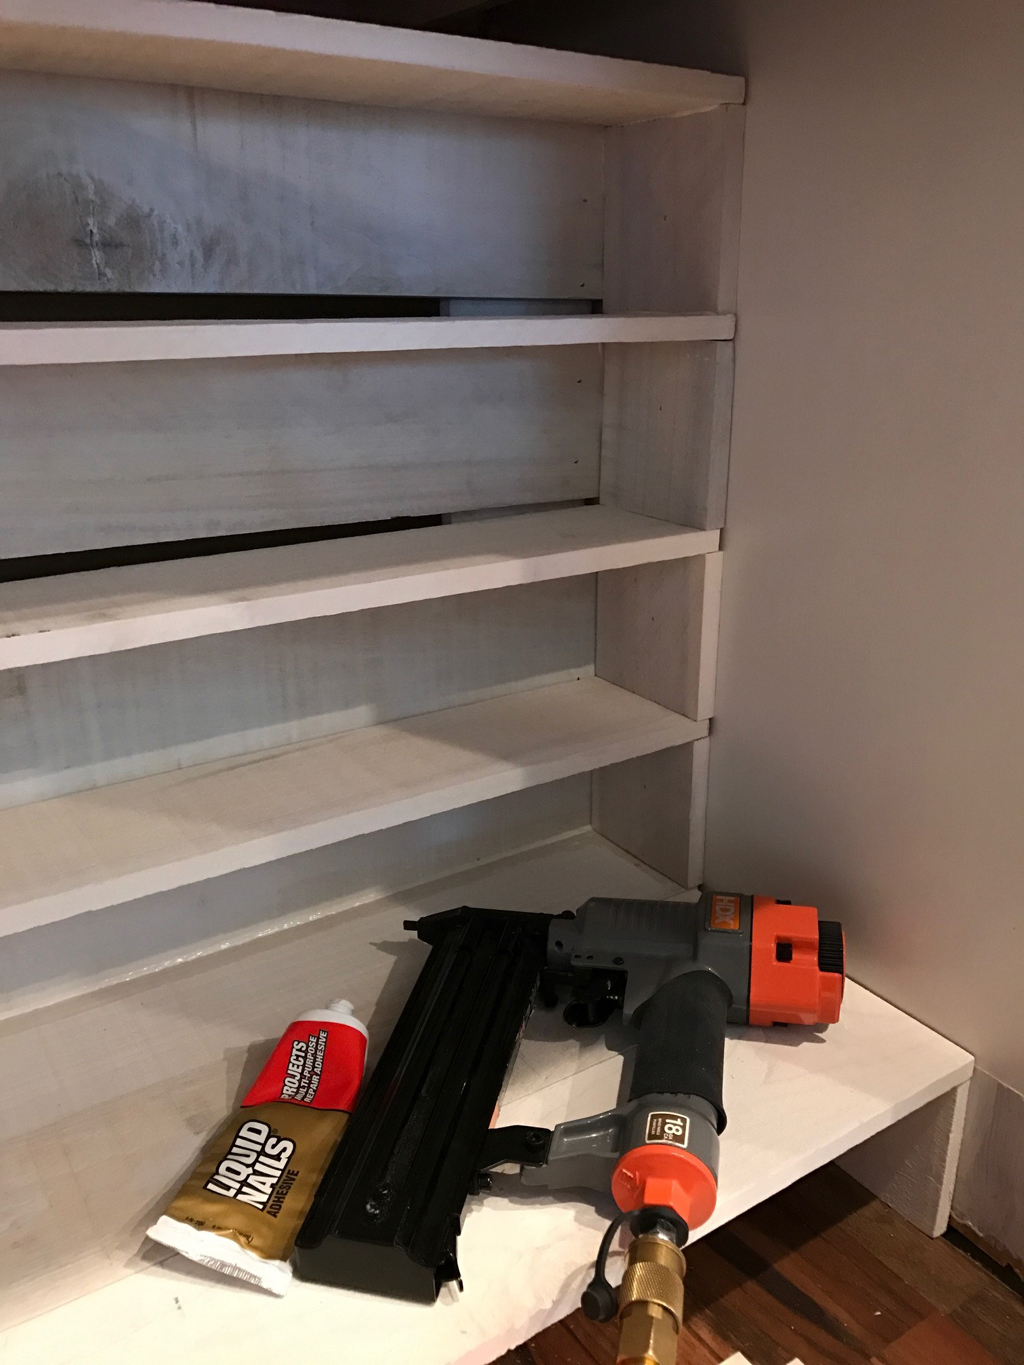
I needed to create an elevated base since my cabinets are trimmed out with 4.5” baseboards to create a uniform look. I began by measuring the depth of the opening to create the base, with two boards standing upright and attached to the cabinets with 1” brad nails.
Next I created the first shelf with three boards and used Liquid Nails to attach them to the base width-wise, as shown in the photo below. The opening was too deep for wine bottles, which is why I chose not to go all the way back with boards and create my own backing which we’ll cover in the next step…
{This post contains affiliate links and is sponsored in part by Weaber Lumber, but all opinions expressed are my own. Affiliate links are no additional cost to you,
and allow us to receive a small percentage of the sale to continue to bring you awesome DIY tutorials. Thank you for your help in supporting our small business!}
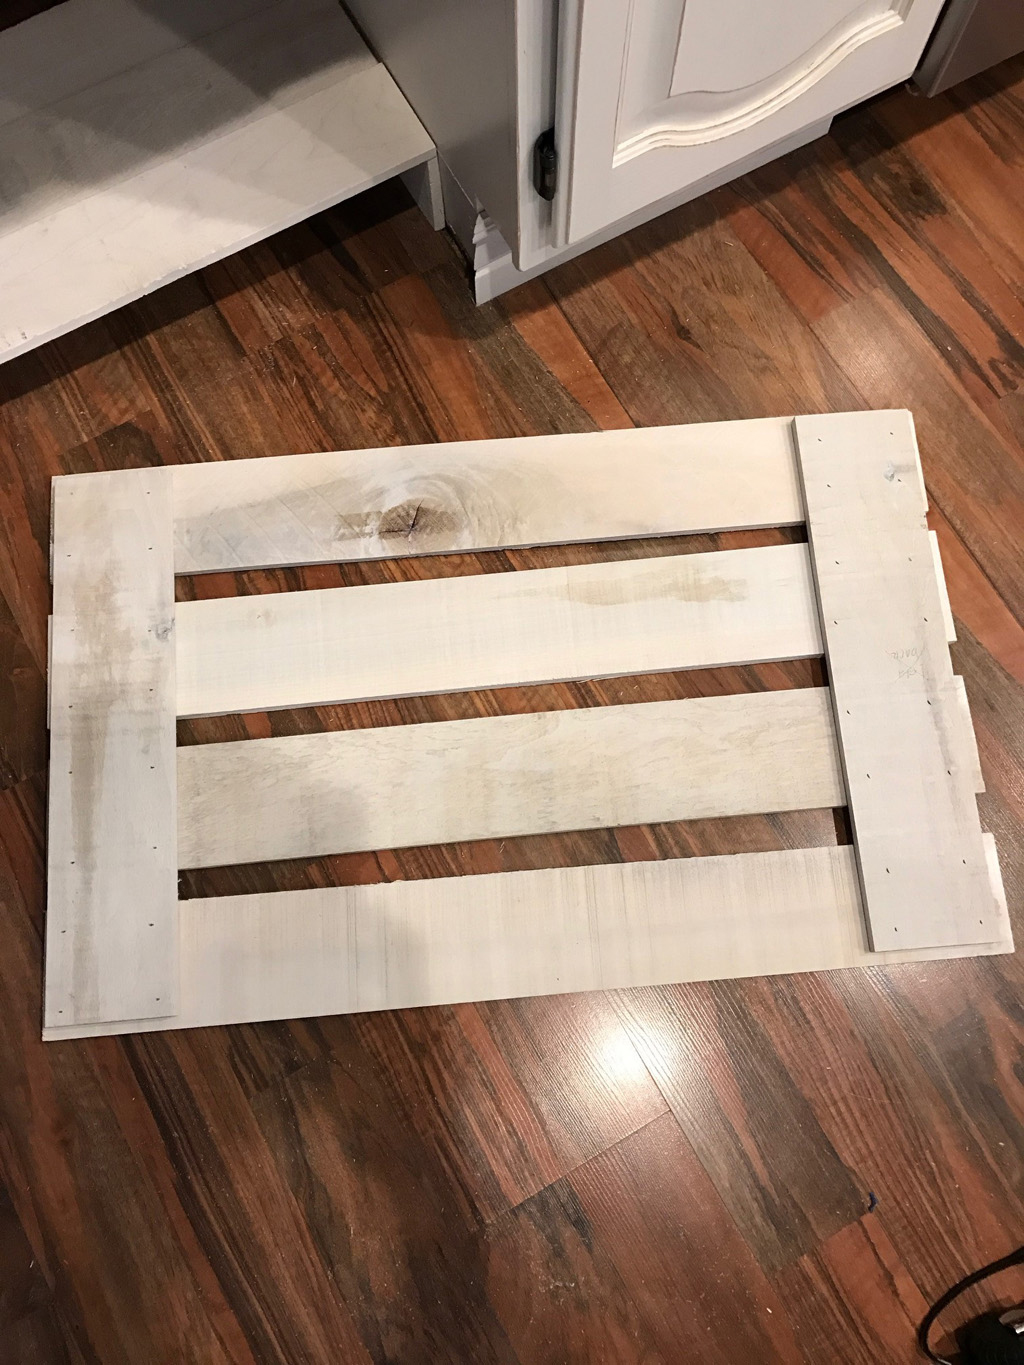
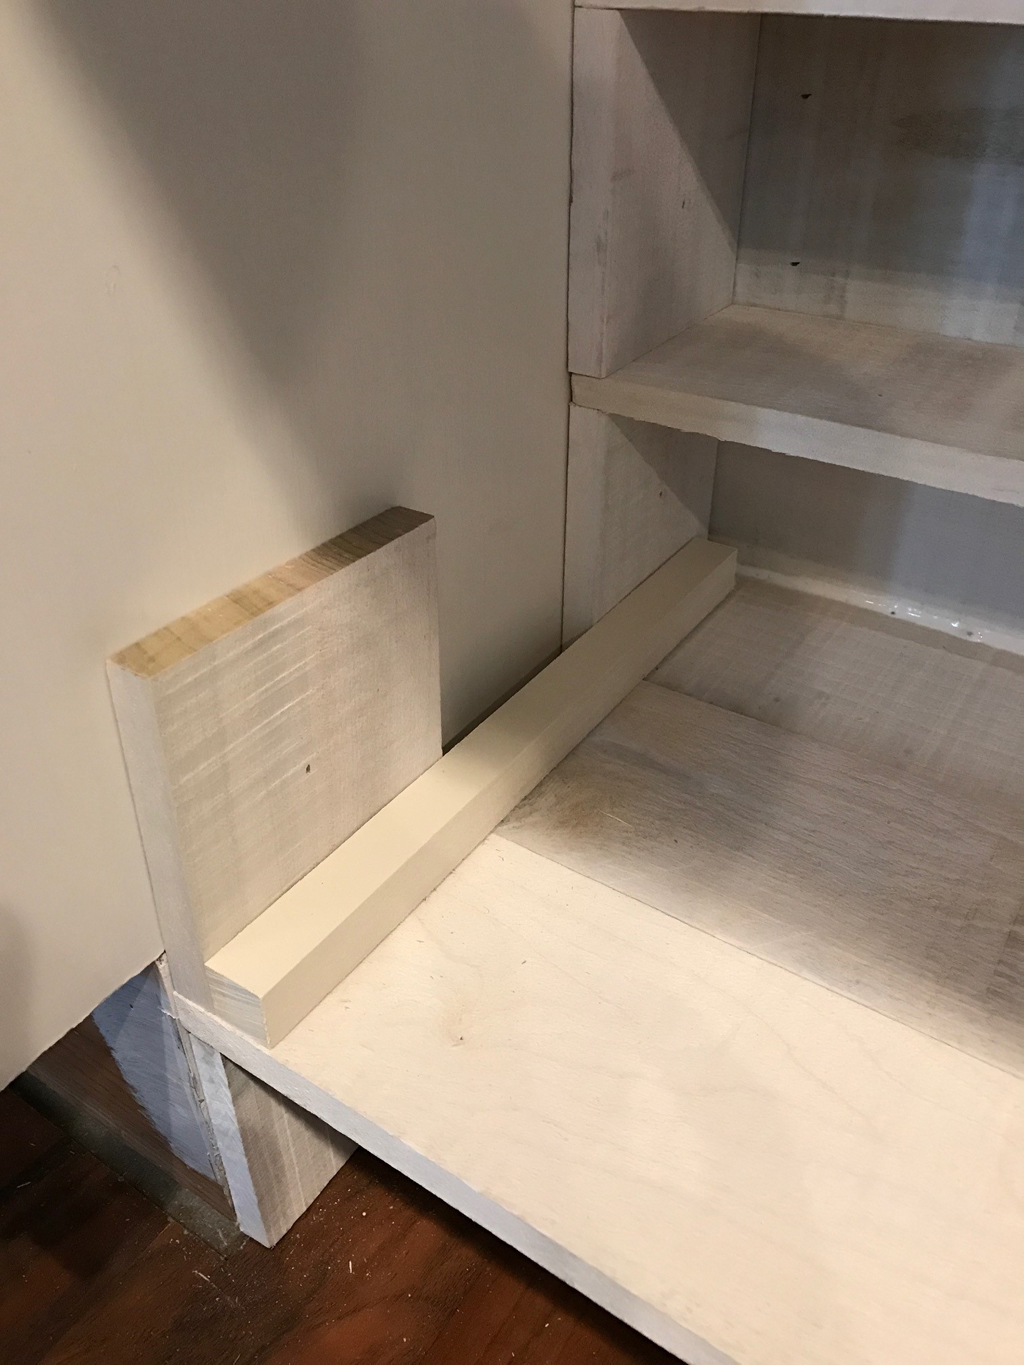
I created a backing with space in between my boards, but you can certainly create a more solid backing with the boards touching. It all comes down to personal preference, and to be honest, I didn’t want to cut the boards length-wise so I chose this route since you can’t really see the slats once the wine rack is full. Plus, that’s a great reason to keep it full. ;)
Cut your boards to the appropriate width and then cut 2 more pieces length-wise to attach to the boards vertically using 5/8” brad nails, as shown below.
Once I made sure it fit ok and no further adjustments were needed, I attached the backing to the base with Liquid Nails. This will take a little bit of time to dry, so you want to make sure you don’t push on it until it’s secure enough to stay in place.
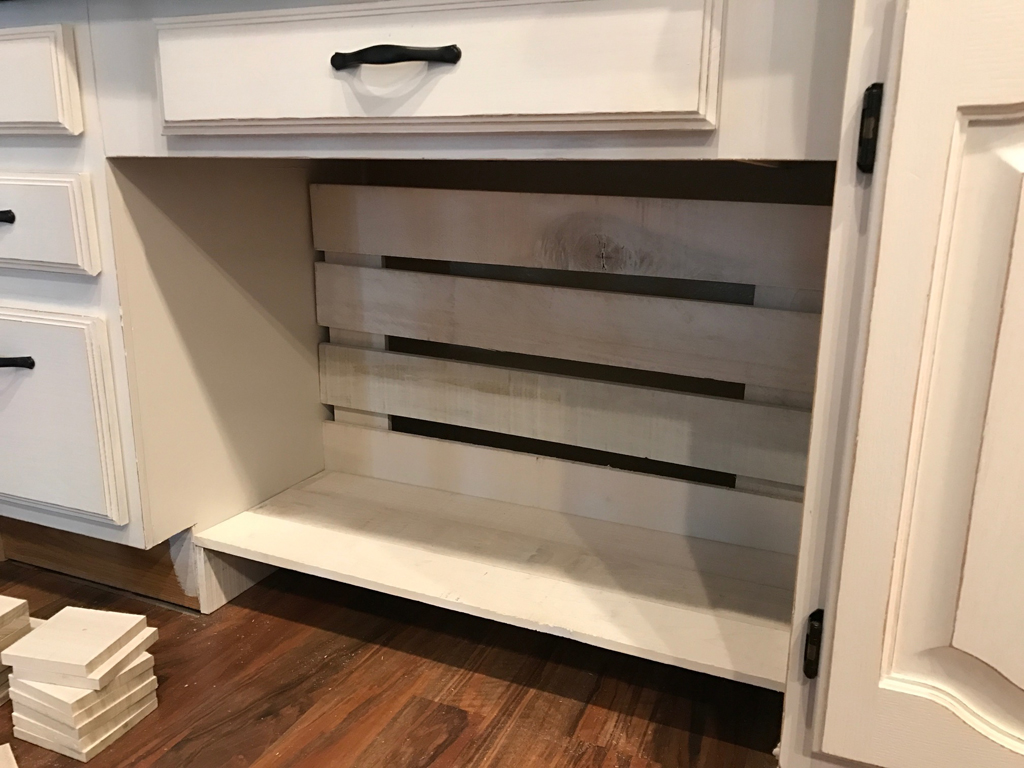
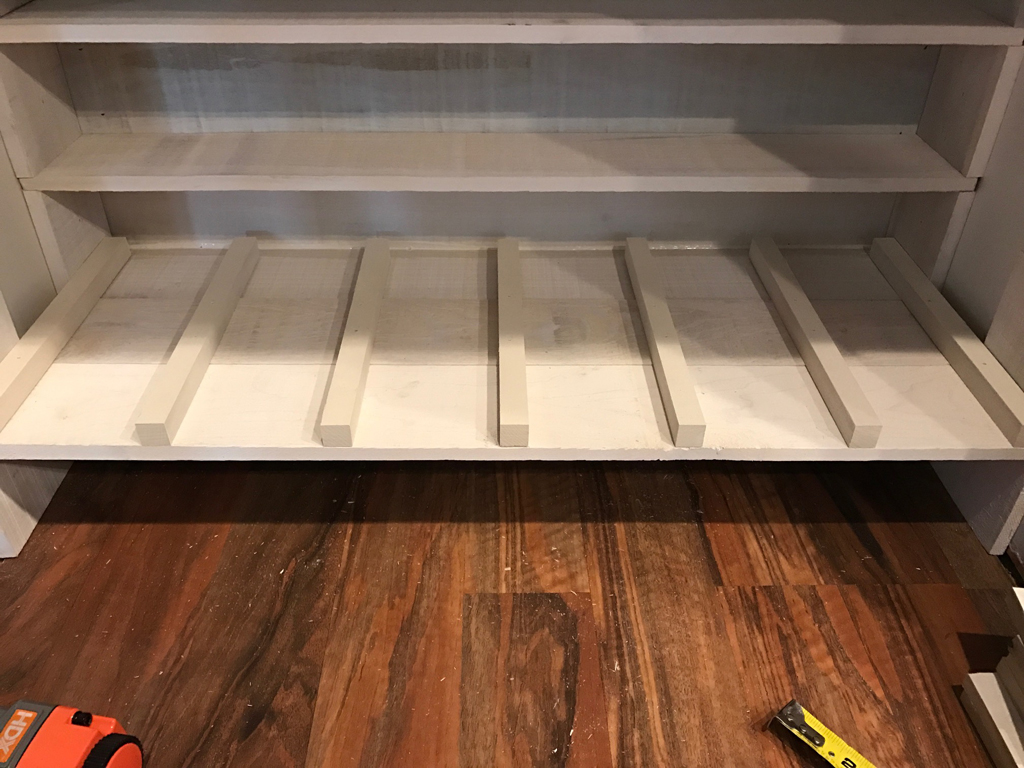
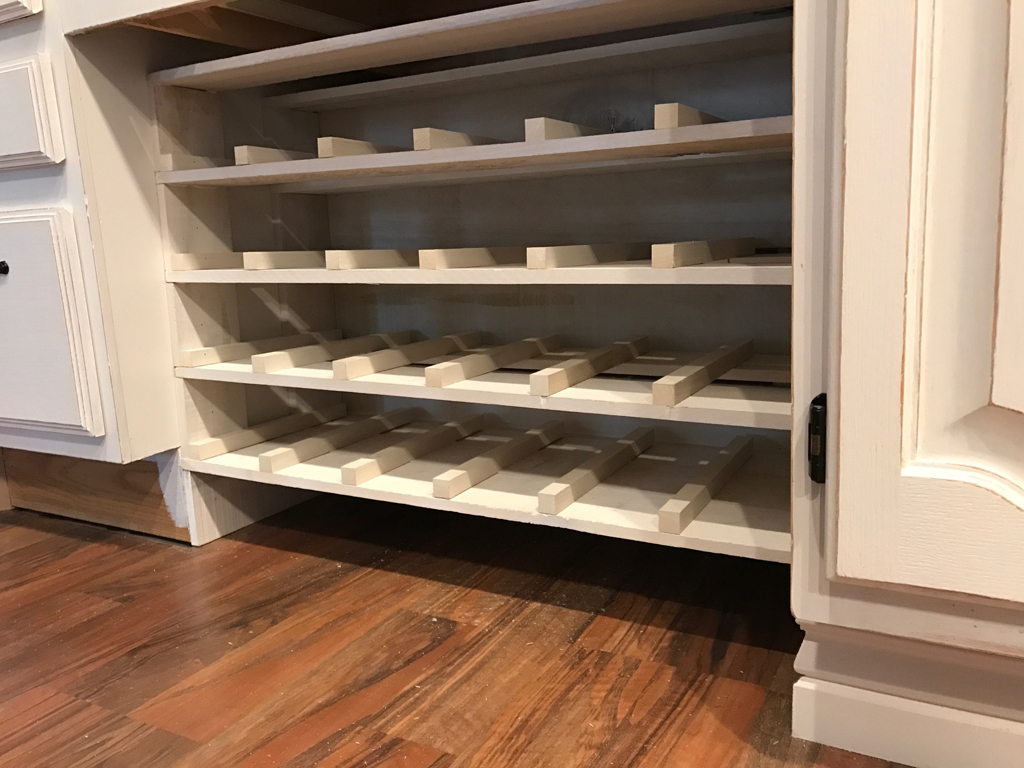
Next I created my first row of shelves. As you can see, my cabinets nor the backing I created are perfectly straight so this is where you’ll want to make sure you have a level to ensure your shelves are straight and any gaps can be filled with trim at the end if your cabinets (or floor) slope.
To create four shelves I cut eight 4” pieces, and four boards cut to the width of the opening which will rest on the 4” pieces as shown in the photo below.
I started from the bottom up and used the nail gun to attach the first two 4” pieces to each side with 1” brad nails, and then used Liquid Nails to attach the first shelf on top of those pieces. Repeat those steps working up to the top until you’ve attached the top shelf.
Those steps will be repeated to create another shelf in the front, with one small step added in between each shelf.
Attach your first two 4” pieces to each side using the same method above, but instead of adding the shelf next, you are going to add the square dowels first (as shown below). The dowels will be attached with 1” nail brads (one toward the front and one toward the back to keep them secure).
Repeat that step to add all of the square dowels to the first level as shown below.
NOTE: Before you secure the remaining dowels to the boards, lay them out across the first level to make sure you’ve spaced them evenly. Ideally you want the dowels 4” apart, but due to the width of my space I had to put them about 4.5” apart. You really don’t want to space them any farther than that as it leaves too much space around the wine bottles.
Once you’ve laid them out and spaced them evenly, re-measure the space from the first dowel on the left to where you’re attaching the second one and then use a 1” brad nail toward the front and one toward the back.
Repeat that step for each dowel until the first row is complete.
Once all of your dowels are nailed down, attach the first shelf with Liquid Nails and repeat the steps above for each row.
NOTE: I created a 4” gap in between my shelves as you can see below as I didn’t find it necessary to create another shelf in between since the bottles are long enough to reach the back and the dowels hold them in place. As you can see, the only problem with that is I wasn’t paying attention to it being perfectly straight before I secured everything. You can’t tell from the front and it’s not incredibly noticeable from the side, but once I noticed it I can’t un-notice it. So learn from my mistake and pay attention to that before you secure everything. Blah!!
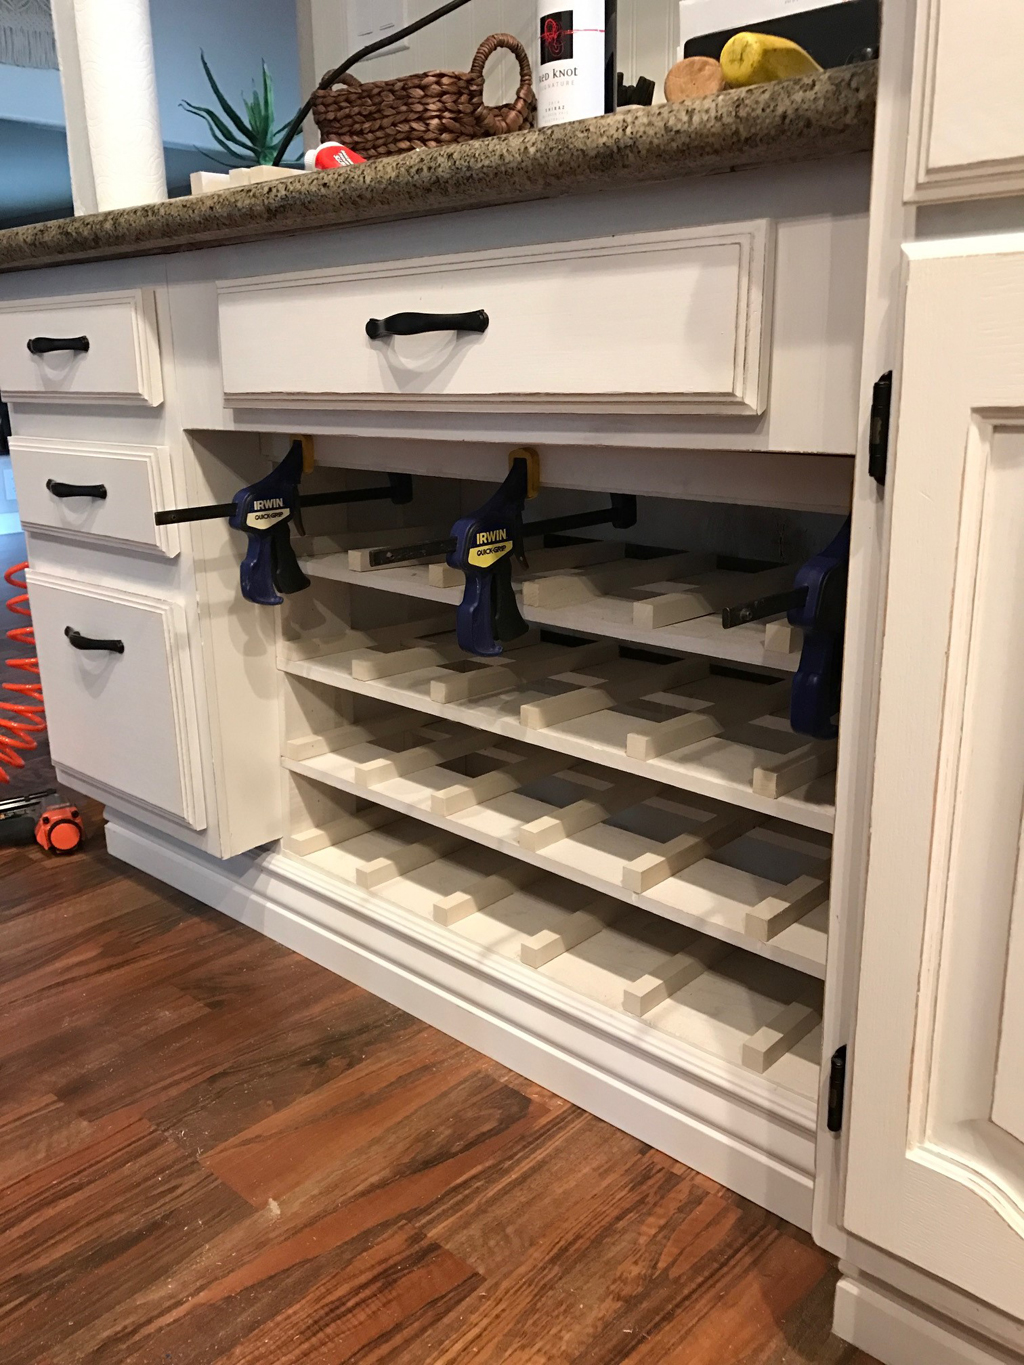
As I mentioned earlier, my cabinets (or maybe the floor) slope a bit so I had to find a 1” trim piece to adhere to the top of the wine rack to close in the gap, as shown below. I attached that with Liquid Nails and used clamps to hold in place while it dried.
Then I added the baseboard to the bottom, a ½” piece of trim to the sides, caulked in all the seams and filled that puppy up with wine!!
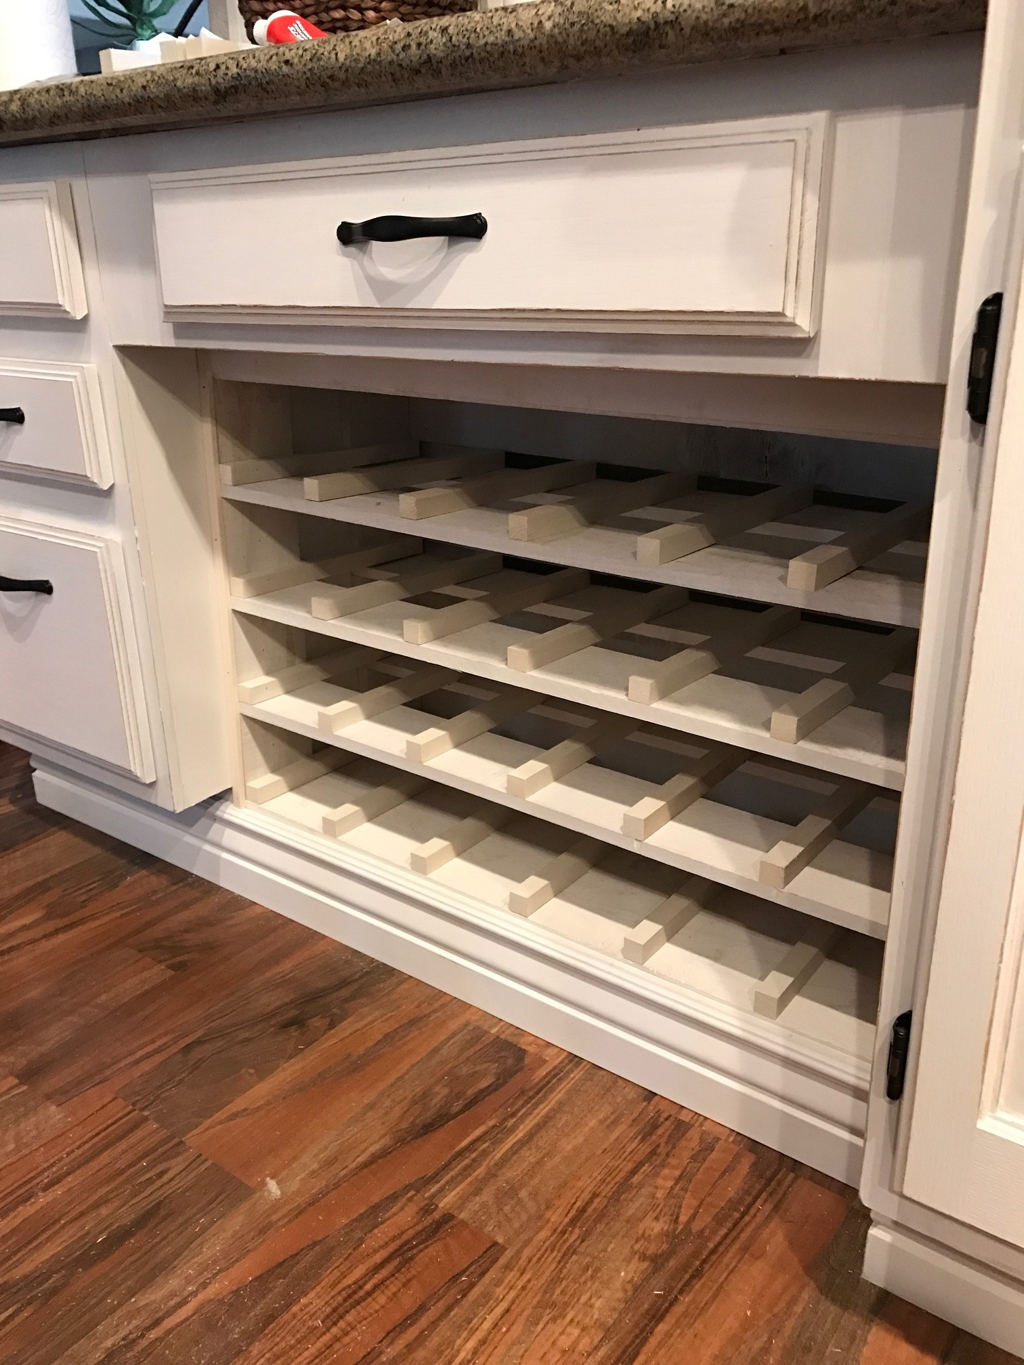
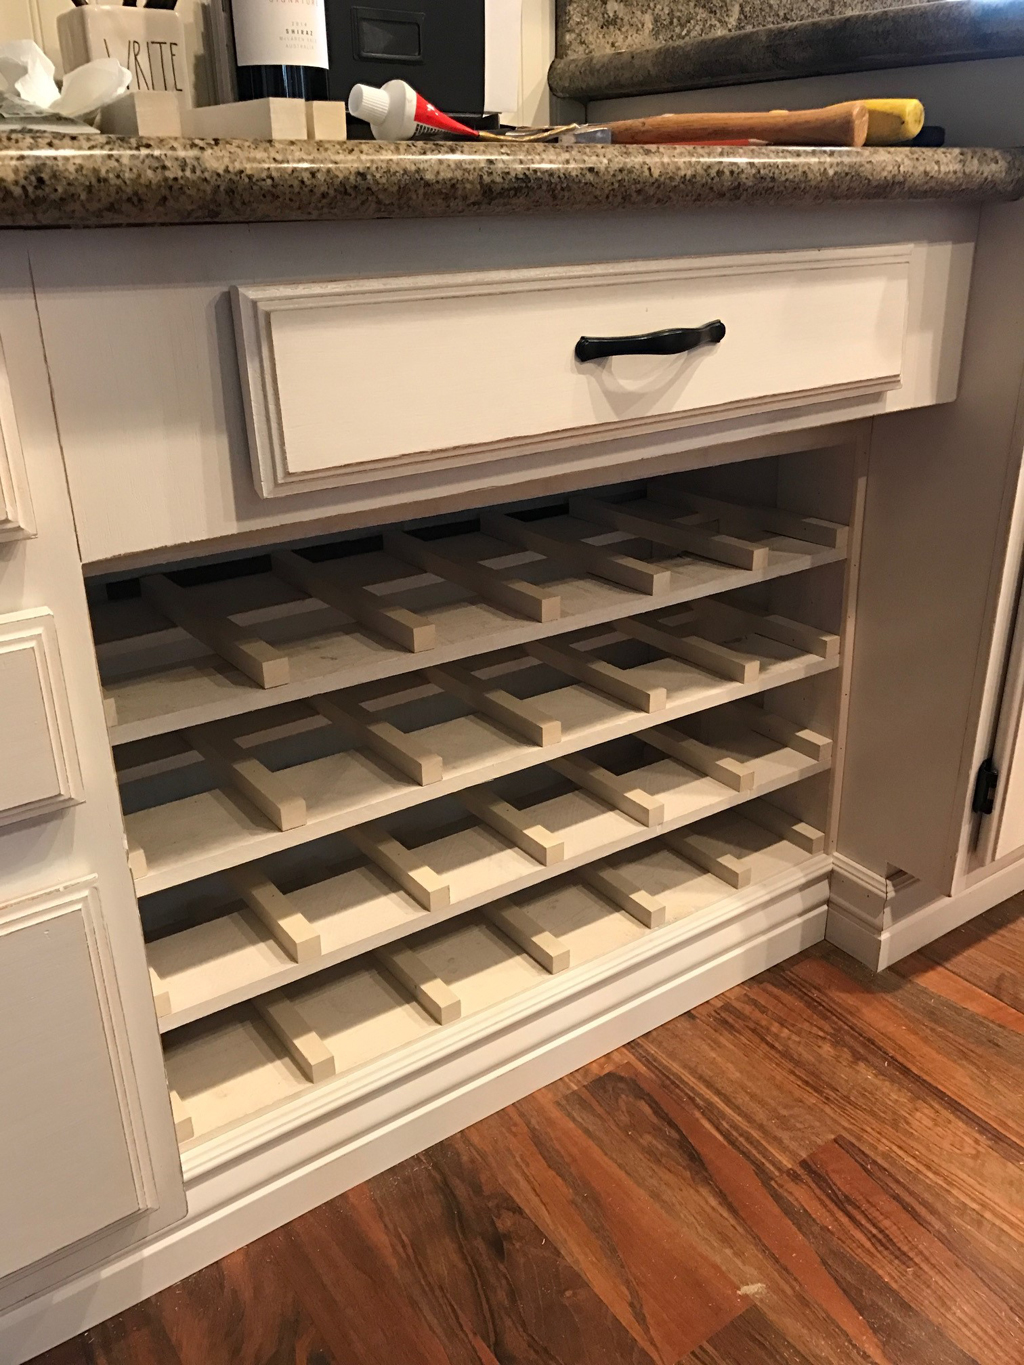
It works so beautifully for that space, and looks like it was always meant to be there! Even if you don’t drink wine, we can still be friends… haha, but seriously you can buy some cheap bottles and use this as more of a decorative piece or you can adjust the measurement and find some baskets to put in there for storage instead. Just use this as your guide to get creative!
If you have any questions, leave a comment below or visit my Instagram post to leave a comment there.
Also be sure to check out my other projects with Weaber Lumber Wall Boards, like the feature wall tutorial here. Happy DIY’ing!!
XO,
Christina